All Posts (5112)

Sort by

bone-grafting-for-dental-implants.jpg

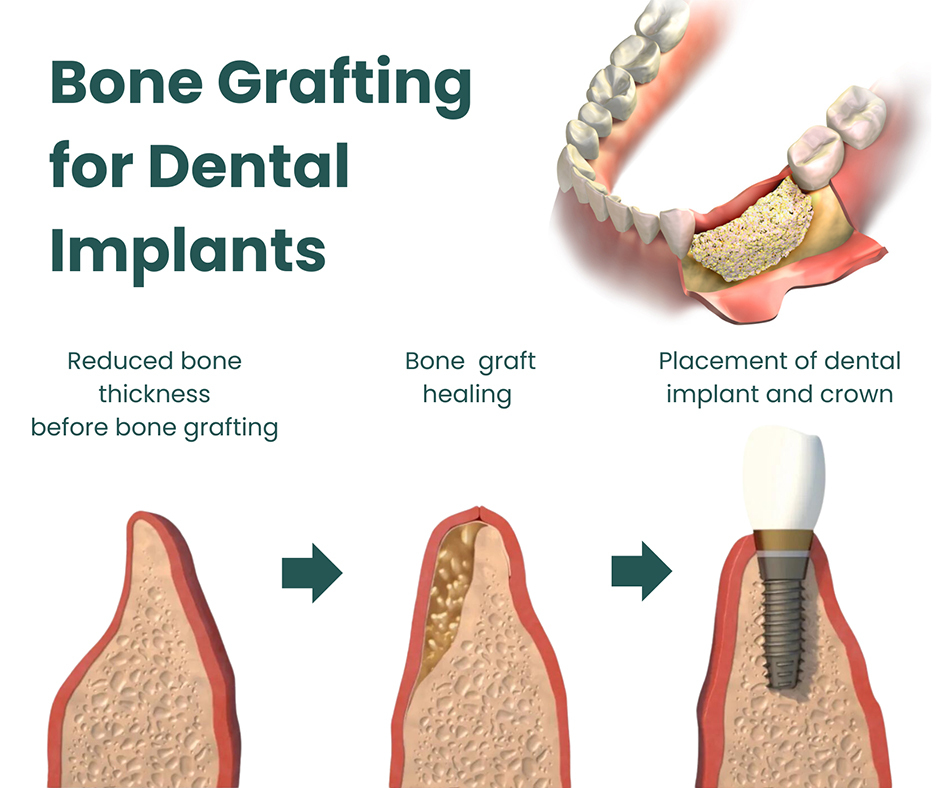
If you're considering a dental implant, you may have heard that you need a bone graft first. For many people, that's the moment the process starts to sound more complicated than they expected. In reality, bone grafting is one of the most common procedures in implant dentistry, and understanding why it's done makes the whole treatment plan easier to follow.

Why Bone Matters for Implants

A dental implant is a small post placed into the jawbone to act as a replacement root. For it to work, the bone has to grow tightly against the implant surface, a process called osseointegration. That requires enough bone height and width to surround the implant completely, with enough density to hold it firmly under chewing forces.

If the bone is too thin, too short, or too soft, the implant may not be stable, may be positioned poorly, or may leave part of its surface exposed. A graft rebuilds the foundation first.

Why Bone Goes Missing

The jawbone around a tooth exists to support that tooth. When the tooth is lost, the body begins to resorb, or break down, the bone that's no longer being used. The most rapid loss happens in the first several months after an extraction, and it continues gradually for years.

Other causes include:

  • Periodontal disease, which destroys the bone that supports teeth
  • Infection around a tooth or a failed root canal
  • Trauma to the face or jaw
  • Long-term denture wear, since dentures put pressure on the ridge without stimulating the bone beneath
  • Natural anatomy, such as an enlarged sinus in the upper back jaw

Common Types of Bone Grafts

Socket preservation. Placed at the time a tooth is extracted. Graft material is packed into the empty socket to limit bone loss while it heals. If an implant is planned for later, this is one of the simplest ways to protect the site.

Ridge augmentation. Used when the jaw ridge has become too narrow or too short. Graft material is added to the side or top of the ridge, often covered with a protective membrane, to rebuild its shape.

Sinus lift. The upper back teeth sit just below the maxillary sinuses. After tooth loss, the sinus can expand downward, leaving little bone. A sinus lift gently raises the sinus membrane and places graft material beneath it to create room for an implant.

Block grafts. For larger defects, a solid piece of bone may be secured to the jaw with small screws. This is less common and is usually reserved for significant bone loss.

Where Graft Material Comes From

Graft materials fall into a few categories:

  • Autograft: Bone taken from your own body, often from another area of the jaw
  • Allograft: Processed human donor bone from a tissue bank
  • Xenograft: Processed bovine (cow) bone mineral
  • Synthetic materials: Biocompatible substances that mimic bone mineral

Most graft materials act as a scaffold. Your body gradually replaces them with your own new bone over the following months. The choice depends on the size and location of the defect and on your surgeon's assessment.

What the Procedure Is Like

Most grafts are performed with local anesthesia, often combined with sedation for comfort. The gum is opened, the graft is placed, and the area is closed with stitches. Many grafts take about an hour or less.

Afterward, swelling and mild discomfort for several days are normal. Some people notice a few small granules of graft material in their mouth during the first week, which is common and usually not a concern.

Healing and Timing

Healing time varies with the type and size of the graft:

  • Socket preservation often heals enough for an implant in about three to four months
  • Ridge augmentation and sinus lifts typically need four to nine months
  • In some cases, a graft can be placed at the same time as the implant, shortening the overall timeline

Your surgeon uses X-rays or 3D scans to confirm the new bone is ready before the implant is placed.

Tips for Healing Well

Follow your surgeon's specific instructions first. In general:

  • Eat soft foods and avoid chewing directly on the graft site
  • Don't smoke, which significantly increases the risk of graft failure
  • Avoid using straws and spitting forcefully for the first few days
  • After a sinus lift, avoid blowing your nose and sneeze with your mouth open
  • Take medications exactly as prescribed
  • Attend every follow-up appointment

Why the Surgeon's Training Matters

Grafting and implant placement involve working around nerves, blood vessels, and the sinuses. An oral surgeon is trained specifically in surgery of the mouth, jaws, and face, including complex grafting and sedation. Often the oral surgeon handles the extraction, graft, and implant, and your general dentist places the final crown, bridge, or denture once everything has healed.

The Takeaway

Bone grafting is a way of preparing the foundation so an implant has the best chance of lasting. The longer a gap goes untreated, the more bone tends to be lost, and the more involved grafting may become. If you've recently lost a tooth or are about to have one removed, asking about socket preservation and your long-term replacement options early can keep your choices simpler.
Read more…

what-you-should-include-in-your-emergency-dental-kits.jpg

Most households have a first-aid kit with bandages and antiseptic. Very few have anything ready for a dental injury. Yet a chipped tooth, a lost crown, or a knocked-out tooth tends to happen at home, on a playing field, or on a weekend, when getting to an office takes time.

A small dental kit, plus a basic understanding of how to use it, can protect a tooth until it can be properly treated. Here is what to include and what each item is for.

What to Put in the Kit

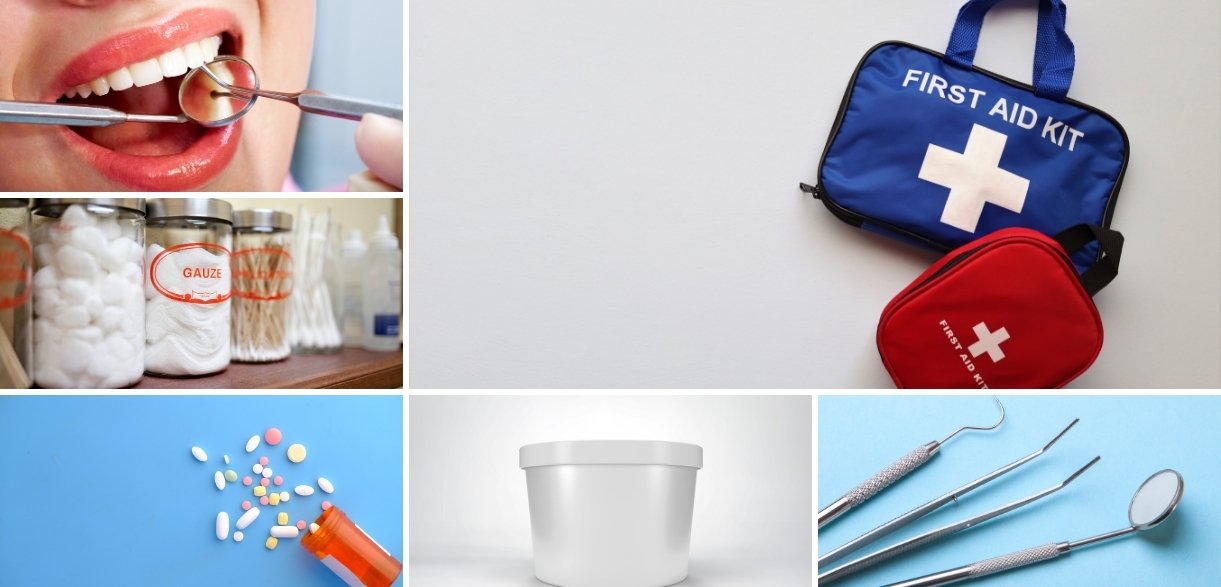
You can fit all of this into a small zippered bag or a plastic container:

  • A small container with a lid. For transporting a knocked-out tooth or broken pieces.
  • Saline solution or a tooth preservation kit. Saline keeps root cells alive far better than water. Commercial tooth-saving kits contain a balanced solution designed for this exact purpose.
  • Sterile gauze. For controlling bleeding and for biting down to hold a tooth in place.
  • A cold pack. For swelling after a blow to the face.
  • Over-the-counter pain reliever. Choose one that is safe for everyone in the household, and follow the label.
  • Temporary dental cement. Sold at most pharmacies. It can hold a loose crown or cover a lost filling for a short time.
  • Orthodontic wax. For covering a broken wire or bracket that is cutting the cheek.
  • Dental floss. For removing something wedged between teeth.
  • A small flashlight. Looking inside a mouth is hard without one.
  • A card with your dentist's phone number and after-hours instructions.

Using It: Knocked-Out Tooth

Handle the tooth by the crown only. If it is dirty, rinse it briefly in saline or milk, without scrubbing. Try to place it back into the socket and have the person bite gently on gauze. If that isn't possible, put the tooth in the container with saline or milk and seek care immediately. The best outcomes occur when a tooth is replanted within about an hour.

Do not reinsert a baby tooth. Store it and bring the child in for an exam, since replanting a primary tooth can harm the adult tooth beneath it.

Using It: Bleeding From the Mouth

Lips, tongue, and cheeks have a rich blood supply, so even minor cuts can look alarming. Rinse gently, then press folded gauze firmly against the area for 15 minutes without lifting to check. A cold pack on the outside of the face helps too.

Bleeding that continues after two rounds of steady pressure, a deep cut through the lip, or a cut that gapes open should be seen promptly, since some need stitches.

Using It: Lost Filling or Crown

Keep the crown if you find it. Clean it gently and check whether it fits back on comfortably. A small amount of temporary cement can hold it in place for a day or two until you can be seen. Never use household glue. Superglue and similar products can damage the tooth and make the crown impossible to reuse.

For a lost filling, temporary cement or even sugar-free gum pressed into the hole can reduce sensitivity briefly. Avoid chewing on that side.

Using It: Broken Braces or Wires

A poking wire is uncomfortable but rarely urgent. Press a small ball of orthodontic wax over the sharp end. If a wire is loose, you can sometimes use the eraser end of a pencil to push it to a less irritating position. Don't cut wires yourself unless your orthodontist has told you how. Call the orthodontic office to schedule a repair.

Using It: Toothache

Use floss first. A surprising number of "toothaches" turn out to be a popcorn hull or a seed lodged under the gum. Then rinse with warm salt water and take a pain reliever as directed. Do not hold aspirin against the gum. A cold pack on the cheek can help with throbbing.

If the pain is severe, keeps you awake, or comes with swelling, the problem is likely inside the tooth and needs professional treatment.

When the Kit Isn't Enough

The kit is for buying time. It doesn't treat the underlying problem. Facial swelling that spreads, difficulty swallowing or breathing, a suspected broken jaw, or a head injury along with a dental injury all mean going to an emergency room first.

For tooth-specific problems, it helps to know in advance where you'd go for emergency dental care, and whether your regular office reserves time for urgent cases. Many general dental practices can repair cracked teeth, recement crowns, treat infections, and stabilize injured teeth, then refer to a specialist if needed.

Kids, Sports, and Prevention

Children and teens account for a large share of dental injuries, most of them from falls and sports. A properly fitting mouthguard is the single most effective way to prevent them. Custom-fitted guards made by a dentist tend to be more comfortable, and players who are comfortable actually keep them in.

A few other habits help everyone:

  • Avoid chewing ice, hard candy, and popcorn kernels
  • Don't open packages or bottles with your teeth
  • Address teeth grinding, which weakens teeth over time
  • Keep up with checkups so worn fillings and small cracks are caught early

Check the kit every few months, replace anything expired, and make sure everyone in the house knows where it is. It takes ten minutes to put together and can make the difference between saving a tooth and losing it.

Read more…

teeth-bonding-vs-veneers.jpg

Maybe your teeth have dulled from years of coffee. Maybe there's a small chip on a front tooth, a gap you've always noticed, or a couple of teeth that don't quite line up. None of it may be a health concern, but it can still make you hesitate to smile.

The three most common cosmetic treatments, whitening, bonding, and veneers, solve different problems. Comparing them by what they fix, how long they last, and whether they can be reversed makes the choice much clearer.

Teeth Whitening

What it fixes: Overall discoloration on healthy teeth.

Coffee, tea, red wine, dark sodas, and tobacco stain the outer enamel over time. Aging also plays a role, as enamel thins and the darker layer beneath it shows through more.

Professional whitening uses a stronger bleaching gel than over-the-counter products, either applied in the office or in custom trays you wear at home. The gums are protected during in-office treatment, and custom trays keep the gel where it belongs.

Things to know:

  • Whitening only works on natural tooth structure. It won't change the color of crowns, veneers, fillings, or bonding.
  • Temporary sensitivity is common and usually fades within a few days.
  • Some stains, especially gray discoloration from certain medications or from trauma, respond poorly to bleaching.
  • Results fade gradually and can be maintained with occasional touch-ups.

Reversible? It isn't undone, but it doesn't remove enamel either. It's the least invasive option.

Dental Bonding

What it fixes: Small chips, minor gaps, isolated stains, and small shape irregularities.

Bonding uses a tooth-colored composite resin, the same type of material used for white fillings. The dentist lightly roughens the tooth surface, applies the resin in layers, sculpts it, hardens it with a curing light, and polishes it.

It works well for:

  • Repairing a chipped edge
  • Closing a small space between teeth
  • Covering a single dark spot
  • Lengthening a short tooth or evening out an irregular one

Things to know:

  • It's often done in one visit, typically with little or no drilling and frequently without numbing.
  • Composite is less stain-resistant and less durable than porcelain. It can pick up stains and may chip, especially on the biting edges.
  • Bonding typically lasts several years before it needs repair or replacement.
  • If you plan to whiten, do it first. Bonding is matched to your tooth shade at the time it's placed and won't lighten afterward.

Reversible? Largely, since little or no enamel is removed.

Porcelain Veneers

What it fixes: Color, shape, size, and the appearance of mild misalignment across several teeth.

Veneers are thin, custom-made shells of porcelain bonded to the front surfaces of the teeth. Because they cover the entire visible surface, they can make substantial changes, including stains that whitening can't reach, worn edges, and teeth of uneven sizes.

Things to know:

  • A thin layer of enamel is usually removed so the veneer sits flush and looks natural.
  • The process generally takes at least two visits: preparation and impressions or scans, then bonding the final veneers. Temporary veneers may be worn in between.
  • Porcelain is highly stain-resistant and reflects light similarly to natural enamel.
  • With good care, veneers commonly last 10 to 15 years or longer.
  • They can still chip or debond, especially in people who grind their teeth or bite hard objects.

Reversible? No. Once enamel is removed, the teeth will always need some kind of covering.

A Quick Comparison


Whitening

Bonding

Veneers

Best for

Overall discoloration

Small, localized fixes

Larger changes to several teeth

Enamel removed

None

Little or none

A thin layer

Typical visits

1 or home trays

Often 1

Usually 2 or more

Durability

Fades gradually

Several years

10 to 15+ years

Relative cost

Lowest

Moderate

Highest


When a Combination Makes Sense

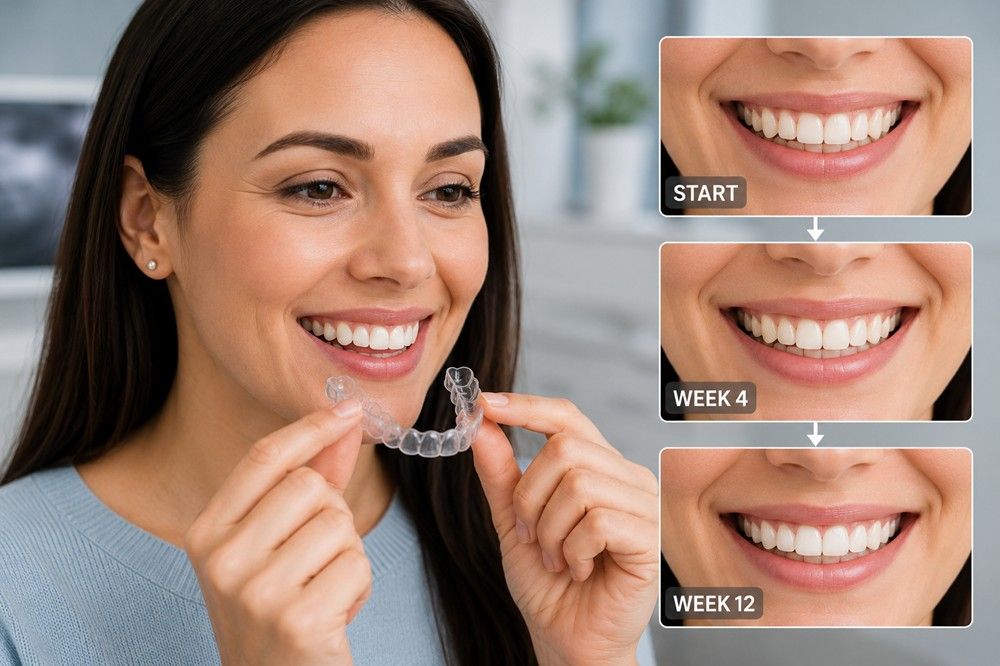
Many smiles benefit from more than one treatment. A common sequence is orthodontic treatment, such as clear aligners, to improve alignment first, then whitening to set the shade, then bonding or veneers on just the teeth that still need it. Straightening first can mean fewer veneers and less enamel removed.

Planning this kind of combination is a core part of cosmetic dentistry. Good results depend on more than color. Tooth proportions, the line of your lips when you smile, and how your teeth meet when you bite all affect whether the outcome looks natural.

Questions to Ask Yourself

  1. What bothers me most? Color, chips, gaps, shape, or alignment?
  2. How much change do I want? A subtle refresh or a dramatic transformation?
  3. How important is reversibility? If you're unsure, start with the least invasive option.
  4. Are my teeth and gums healthy? Cavities and gum disease need to be treated before cosmetic work.
  5. Do I grind my teeth? Grinding affects the durability of bonding and veneers, and a night guard may be recommended.

Keeping Results Looking Good

  • Keep up with cleanings and checkups
  • Rinse with water after coffee, tea, or wine
  • Wear a night guard if you clench or grind
  • Avoid chewing ice, pens, or fingernails
  • Use a non-abrasive toothpaste, especially with bonding

Some people come in expecting to need veneers and find that whitening and a little bonding achieve what they wanted. Understanding the trade-offs is the best way to choose a treatment that fits your goals, your budget, and your teeth.

Read more…

If you've been told you need a "deep cleaning," you might wonder what makes it different from the cleaning you normally get, and whether it's really necessary. It's a fair question. The short answer is that a regular cleaning and a deep cleaning treat two different situations.

Here's what scaling and root planing is, why it's recommended, what the appointment is like, and what happens afterward.

Regular Cleaning vs. Deep Cleaning

A routine cleaning, called a prophylaxis, is preventive. It removes plaque and tartar from the tooth surfaces above the gumline and slightly below it. It's designed for gums that are healthy or only mildly inflamed.

A deep cleaning, known as scaling and root planing, is a treatment for periodontitis, the more advanced stage of gum disease. In periodontitis, the gums have pulled away from the teeth and formed pockets. Bacteria and hardened tartar collect deep in those pockets on the root surfaces, where neither a toothbrush nor a routine cleaning can reach.

Put simply, a regular cleaning maintains healthy gums. A deep cleaning treats an active infection under them.

How Dentists Decide You Need One

The recommendation usually comes from three pieces of information.

Pocket depths. During a gum exam, a thin measuring probe is placed gently between each tooth and the gum. Healthy measurements are generally 1 to 3 millimeters. Readings of 4 millimeters or more, particularly with bleeding, indicate that the gum has detached from the tooth.

X-rays. These show the level of bone around each tooth. Bone loss confirms that gum disease has moved beyond gingivitis.

Tartar below the gumline. Hardened deposits on the roots act as a constant irritant and a place for bacteria to grow.

When these findings line up, a routine cleaning would only clean the visible part of the problem.

What Happens During the Procedure

Scaling and root planing is often done one or two sections of the mouth at a time, sometimes over two visits. The area is numbed with local anesthetic, so most people feel pressure and vibration rather than pain.

Scaling removes plaque and tartar from the tooth surfaces and from the roots down to the bottom of each pocket. This is done with a combination of ultrasonic instruments, which use vibration and water, and fine hand instruments.

Root planing smooths the root surfaces. Rough spots on the root make it easier for bacteria to cling. A smoother surface helps the gum tissue heal and reattach more snugly to the tooth.

In some cases, an antimicrobial rinse or a locally placed antibiotic is used in deeper pockets to help control bacteria.

What Recovery Feels Like

Expect some tenderness for a few days. Gums may feel sore and teeth may be more sensitive to cold, since root surfaces that were covered by tartar are now exposed. This sensitivity usually fades over several weeks, and a sensitivity toothpaste can help.

General recovery tips:

  • Eat softer foods for a day or two
  • Rinse with warm salt water to soothe the gums
  • Use an over-the-counter pain reliever as directed
  • Keep brushing and cleaning between teeth gently, even if it's a little tender
  • Avoid smoking, which slows gum healing

You may also notice that your gums look slightly lower afterward. As swelling goes down, the tissue tightens around the teeth. This is a sign of healing, not damage.

The Follow-Up Visit

A few weeks after treatment, your pockets are measured again. In many cases, the depths decrease noticeably because inflammation has resolved and the gum has tightened against the root. Shallower pockets are easier to keep clean at home.

If some pockets remain deep, your dental team may discuss additional options, which can include referral to a periodontist, a specialist in gum disease.

Why Maintenance Visits Matter

Periodontitis is managed rather than cured. The bacteria that cause it return over time, and pockets can deepen again if they aren't monitored. For that reason, patients who've had scaling and root planing are usually placed on periodontal maintenance, often every three to four months instead of every six.

These visits clean below the gumline and track pocket depths so any change is caught early. Skipping them is one of the most common reasons gum disease comes back.

Who Is More at Risk

Anyone can develop periodontitis, but risk is higher with:

  • Smoking or vaping
  • Diabetes
  • A family history of gum disease
  • Crowded or overlapping teeth that are hard to clean
  • Long gaps between professional cleanings
  • Chronic stress and poor sleep

Because gum disease often runs in families and habits are shared at home, it makes sense for everyone in a household to have their gums evaluated. A family dentist who sees multiple generations can often spot these patterns early.

Is It Worth Doing?

Untreated periodontitis is one of the leading causes of tooth loss in adults. The bone that holds your teeth in place doesn't regrow on its own once it's lost. Scaling and root planing is a conservative, nonsurgical way to stop that process while it's still manageable.

If a deep cleaning has been recommended, ask to see your pocket measurements and X-rays. Understanding the numbers makes it much easier to see why the treatment matters, and to track your progress afterward.

Read more…

Dental-Implant-Components-Info-1024x858.jpg

A missing tooth is easy to put off. If it's in the back, no one sees it, and you learn to chew on the other side. If it's in front, you perfect a closed-mouth smile. Either way, the decision about how to replace it can feel confusing, especially when friends and relatives swear by whatever they had done decades ago.

There are three main ways to replace missing teeth. Each has real strengths and limitations. Here's how they compare.

Why Replacing a Tooth Matters

A gap doesn't stay the same. Nearby teeth tend to tip and drift into the open space. The tooth in the opposite jaw can gradually move up or down because it has nothing to bite against. These shifts can change your bite, create spaces where food gets trapped, and make neighboring teeth harder to clean.

The jawbone changes too. Bone stays dense partly because tooth roots transmit chewing forces into it. Without a root, the bone in that area slowly shrinks. This is why people who have been missing several teeth for years can develop a sunken appearance around the mouth.

Option 1: The Fixed Bridge

A traditional bridge uses the teeth on either side of the gap as supports. Those teeth are shaped and covered with crowns, and a replacement tooth is attached between them as one connected piece.

Advantages:

  • It's fixed in place and doesn't come out
  • Treatment is usually completed in a few weeks
  • It looks and functions much like natural teeth

Limitations:

  • The supporting teeth must be reshaped, even if they're healthy
  • It doesn't replace the root, so it doesn't prevent bone loss under the gap
  • Cleaning under the false tooth requires floss threaders or special brushes
  • If a supporting tooth develops decay or fails, the whole bridge is affected

A bridge is often a sensible choice when the teeth next to the gap already have large fillings or need crowns.

Option 2: Dentures

Dentures are removable replacements. A partial denture fills one or more gaps and clasps onto the remaining natural teeth. A full denture replaces all the teeth in an upper or lower arch and rests on the gums.

Advantages:

  • Usually the lowest upfront cost for replacing many teeth
  • No surgery needed for conventional dentures
  • Can be adjusted, relined, or remade as the mouth changes

Limitations:

  • They can shift during eating and speaking, especially lower full dentures
  • Chewing efficiency is noticeably lower than with natural teeth
  • They need to be removed for cleaning and usually overnight
  • They don't stop bone loss, and the fit loosens as bone shrinks over time

Option 3: Dental Implants

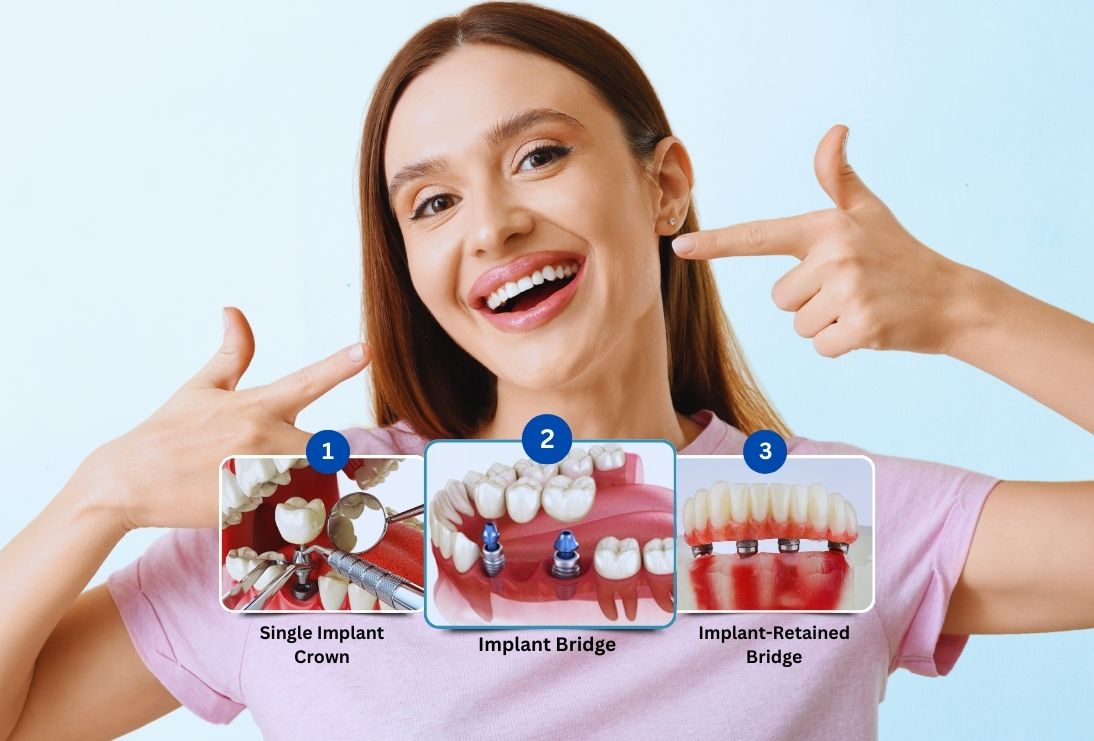
An implant is a small titanium or ceramic post placed into the jawbone, where it functions as a replacement root. Over several months, the bone fuses to the implant surface in a process called osseointegration. A crown, bridge, or denture is then attached on top.

Advantages:

  • Replaces the root, helping preserve the surrounding bone
  • Doesn't require altering neighboring teeth
  • Stable and strong for chewing
  • Cleaned with regular brushing and flossing
  • With good care and regular checkups, implants can last for decades

Limitations:

  • It involves a minor surgical procedure
  • Treatment typically takes several months to allow healing
  • Upfront cost is usually higher than a bridge or denture
  • Some patients need a bone graft first if bone has been lost
  • Uncontrolled diabetes and heavy smoking can increase the risk of complications

Dental implants can also stabilize dentures. Implant-supported dentures snap onto two or more implants, which greatly reduces slipping. Full-arch options use four to six implants to support a complete set of fixed teeth that don't come out.

Comparing Them Side by Side


Bridge

Denture

Implant

Fixed or removable

Fixed

Removable

Fixed (or snap-in for dentures)

Affects neighboring teeth

Yes

Partials clasp onto them

No

Preserves jawbone

No

No

Yes

Treatment time

Weeks

Weeks

Months

Upfront cost

Moderate

Lowest

Highest


Which Option Fits Your Situation?

As a general guide:

  • One missing tooth with healthy neighbors: An implant is often the strongest long-term choice.
  • Neighboring teeth already need crowns: A bridge may make sense.
  • Many missing teeth and a limited budget: A denture is a practical starting point.
  • A loose or uncomfortable denture: Ask about implant-supported options.

Other factors matter too, including your bone density, gum health, overall health, how you clean your teeth, and how long you want the solution to last. A full exam with X-rays, and often 3D imaging for implants, gives the clearest picture.

Thinking About Cost Over Time

Upfront price is only part of the comparison. Bridges commonly need replacement after 10 to 15 years, and dentures need periodic relines and eventual remakes. Implants cost more initially but often require fewer replacements over a lifetime. Asking for an estimate of long-term maintenance alongside the initial cost helps make a fair comparison.

The Bottom Line

There's no single best answer for everyone. A bridge offers a fixed result relatively quickly, a denture replaces many teeth at a lower cost, and an implant comes closest to restoring a natural tooth and root. Understanding the trade-offs puts you in a much better position to choose what fits your mouth, your budget, and your priorities.

Read more…

Many people who want to change their smile share something in common: they really don't like sitting in a dental chair. The sounds, the smells, the feeling of not being in control, or a bad experience from childhood can make even a short visit stressful. The idea of a longer cosmetic appointment can feel out of reach.

3-Ways-to-Combat-Dental-Anxiety.jpg

Dental anxiety is one of the most common reasons people delay care. The good news is that there are proven ways to manage it, and cosmetic treatment can often be planned around it. Here's what helps.

Why Dental Anxiety Matters

Anxiety isn't just uncomfortable. It changes behavior. People with significant dental fear are more likely to skip checkups, which allows small problems to grow. Larger problems need more involved treatment, which increases the fear. Breaking that cycle usually starts with understanding that anxiety is a legitimate concern your dental team can work with, not something you need to hide.

Start With a Conversation, Not a Procedure

One of the most effective steps is simply separating the first visit from any treatment. A consultation where you sit upright, talk about your goals, and ask questions lets you meet the team and see the space without anything happening in your mouth.

Use that time to:

  • Say plainly that you're anxious. It helps the team pace the appointment and explain each step.
  • Describe what bothers you most. The noise, needles, gagging, feeling numb, or not knowing what's happening each have different solutions.
  • Agree on a stop signal. Raising a hand is common. Knowing you can pause at any time gives back a sense of control.
  • Bring reference photos of smiles you like and don't like, so you're aligned on goals before any work begins.

Comfort Measures That Make a Difference

Small, practical comforts can lower stress more than people expect:

  • Noise-cancelling headphones or earbuds to block out instrument sounds
  • Watching a show or listening to music to keep your mind occupied
  • A blanket or neck pillow for longer appointments
  • Topical numbing gel before an injection
  • Frequent short breaks to rest your jaw

It's reasonable to ask a cosmetic dentist which of these they offer before you book.

Understanding Sedation Options

For moderate to severe anxiety, sedation can make treatment possible. There are several levels, and the right one depends on your health, your anxiety, and the length of the procedure.

Nitrous oxide. Often called laughing gas, it's breathed through a small nose mask. It produces a relaxed, lightly euphoric feeling, takes effect within minutes, and wears off quickly once the mask is removed. Many people can drive themselves home afterward.

Oral sedation. A prescribed pill taken before the appointment. You remain awake and able to respond, but feel drowsy and calm, and may remember little of the visit. You'll need someone to drive you.

IV sedation. Medication delivered through a vein, allowing deeper and more adjustable sedation. It's typically used for longer or more involved procedures and requires additional monitoring and training.

Before any sedation, expect questions about your medical history, medications, and any breathing or sleep issues. Answer them fully, because they determine which option is safe for you.

Planning Cosmetic Work Around Anxiety

Cosmetic treatment doesn't have to happen in one long appointment. Breaking it into stages is often easier on anxious patients and gives you time to build trust.

A staged approach might look like this:

  1. A cleaning and exam first. It's low-stakes and lets you get comfortable.
  2. Whitening. Usually painless, and it sets the shade target for later work.
  3. Bonding or minor reshaping. Often done with little or no numbing.
  4. Veneers, crowns, or orthodontic treatment once you know what to expect.

Some treatments are naturally gentler than others. Professional whitening and bonding are minimally invasive. Clear aligners involve no drilling at all. Veneers require removing a thin layer of enamel and are a bigger step, which is one reason many people do them after building confidence with simpler treatments.

Continuity of Care Helps

Seeing the same dentist at each visit can reduce anxiety considerably. You don't have to explain your fears again to someone new, and you learn how that dentist works, how they communicate, and what to expect. If continuity matters to you, ask whether you'll see the same provider throughout your treatment.

Concerns About Looking Unnatural

After anxiety, the second most common worry is ending up with teeth that look fake. Natural-looking results come from careful planning: shade, shape, translucency, and proportions that match your face and your other teeth. Ask to see before-and-after examples, ask how the shade will be chosen, and say clearly if you want a subtle result rather than very bright white.

Taking the First Step

For most anxious patients, the hardest part is making the first appointment. Once you have a plan, a stop signal, and comfort measures in place, treatment usually feels far more manageable than expected.

You don't need to love going to the dentist. You only need an approach that makes it possible to show up, at a pace that works for you.

Read more…

images?q=tbn:ANd9GcTR11bSzr1iPKWu5bQsRZw7ecWguQF0_MyQ-avAv1V3ai8PwVDP83i7Zcsy&s=10

You brush, you spit, and there's a streak of pink in the sink. Most people assume they brushed too hard and move on. Sometimes that's true. But healthy gums generally don't bleed during normal brushing, so recurring bleeding is worth understanding.

There are several possible causes, ranging from simple technique problems to early gum disease. Here's how to sort through them.

Cause 1: Plaque at the Gumline (Gingivitis)

This is the most common reason by far. Plaque is the soft, sticky film of bacteria that builds up on teeth throughout the day. When it sits along the gumline, the tissue reacts with inflammation. Gums become red, puffy, and tender, and they bleed easily.

That condition is gingivitis, the earliest stage of gum disease. The encouraging part is that gingivitis is generally reversible. With thorough brushing, daily flossing, and a professional cleaning to remove hardened tartar, inflamed gums often return to normal within a few weeks.

Cause 2: Brushing Technique

Hard-bristled brushes and aggressive scrubbing can irritate gum tissue and, over time, contribute to gum recession. If you notice bleeding mainly in one spot, or your brush bristles splay out within a few weeks, technique may be part of the problem.

Switch to a soft-bristled brush. Angle the bristles about 45 degrees toward the gumline and use small, gentle circles rather than long sawing strokes. Electric brushes with pressure sensors can help people who tend to press too hard.

Cause 3: Starting a New Flossing Routine

If you've just begun flossing after a long break, some bleeding in the first week or two is common. Inflamed tissue between the teeth bleeds when disturbed. The mistake many people make is stopping because of the bleeding. In most cases, steady, gentle flossing is exactly what calms the inflammation down.

If bleeding hasn't improved after about two weeks of daily flossing, that's a sign to have your gums checked.

Cause 4: Hormonal Changes

Shifts in hormones can make gums more reactive to plaque. This is often seen during pregnancy, sometimes called pregnancy gingivitis, as well as during puberty and with some hormonal medications. The gums aren't necessarily diseased, but they respond more strongly to the same amount of plaque. Extra attention to home care and keeping up with cleanings helps.

Cause 5: Medications and Health Conditions

Blood thinners and some other medications can make gums bleed more easily. Certain health conditions affect gum tissue too. Diabetes, in particular, has a well-documented two-way relationship with gum health: uncontrolled blood sugar makes gum disease more likely, and active gum disease can make blood sugar harder to manage.

Always tell your dental team about medications and medical conditions. Never stop a prescribed medication because of gum bleeding without talking to the prescribing doctor.

Cause 6: Periodontitis

When gingivitis goes untreated, it can progress to periodontitis. At this stage the infection affects the ligament and bone that hold teeth in place. The gums pull away from the teeth and form pockets where bacteria collect, out of reach of a toothbrush.

Periodontitis often isn't painful, which is why it's easy to miss. Warning signs include:

  • Persistent bad breath or a bad taste
  • Gums that are receding, making teeth look longer
  • Teeth that feel loose or have shifted
  • A change in how your teeth fit together when you bite
  • Pus between the teeth and gums

Unlike gingivitis, the bone loss from periodontitis isn't reversible by home care alone. It needs professional treatment to stop it from progressing.

What a Gum Exam Involves

A dentist or hygienist evaluates gum health mainly by measuring the space between each tooth and the gum around it, using a small, thin ruler called a probe. Healthy spaces typically measure 1 to 3 millimeters. Deeper readings, especially with bleeding, suggest the gums have detached and pockets have formed.

X-rays show the bone levels around the teeth. Together, the measurements and X-rays tell your dental team whether a regular cleaning is enough or whether a deeper cleaning below the gumline is needed.

A Daily Routine That Supports Healthy Gums

  • Brush twice a day for two minutes, aiming the bristles at the gumline
  • Clean between the teeth every day with floss, floss picks, interdental brushes, or a water flosser
  • Replace your toothbrush every three months, or sooner if the bristles are frayed
  • Stay hydrated. Saliva naturally helps control bacteria, and a dry mouth gives plaque an advantage
  • Avoid tobacco. Smoking reduces blood flow to the gums, which can actually mask bleeding while gum disease gets worse
  • Keep regular cleanings, since tartar can only be removed with professional instruments

When to Get It Checked

Occasional bleeding after brushing too hard once isn't cause for alarm. But see a dental professional if your gums bleed most days, if bleeding continues after two weeks of good home care, or if you notice any of the periodontitis warning signs above.

A little pink in the sink is easy to ignore. It's also one of the earliest and most useful signals your mouth gives you, and it's much easier to address now than after the supporting bone has been affected.

Read more…

emergency-dentist-2207.jpg

Teeth rarely break at a convenient moment. A popcorn kernel on a Friday night, an ice cube at a cookout, a fall off a bike the day before a trip. When something suddenly goes wrong in your mouth, the hardest part is often deciding how urgent it really is.

This guide walks through the most common dental emergencies, how to sort them by urgency, and what to do in the first few minutes before you can be seen.

Three Levels of Urgency

It helps to think about dental problems in three tiers.

Go to the emergency room. Facial swelling that is spreading, swelling that reaches the eye or neck, trouble breathing, trouble swallowing, a high fever with mouth pain, or a jaw that may be broken. These can signal a serious infection or injury, and they need hospital-level care first.

See a dentist the same day. A tooth that has been knocked out, a tooth that has been pushed out of position, severe or throbbing pain, a cracked tooth with sharp pain, swelling in the gums, a pimple-like bump on the gum, or bleeding that won't stop after 15 to 20 minutes of firm pressure.

Schedule soon, but it can wait a day or two. A small chip with no pain, a lost filling that isn't sensitive, a crown that came off cleanly, mild sensitivity to cold, or a dull ache that comes and goes. These still need attention, because small problems tend to grow, but they are not middle-of-the-night situations.

Knocked-Out Adult Tooth

This is the one where minutes matter most. A permanent tooth has the best chance of being saved if it is back in the socket within about an hour.

  1. Pick the tooth up by the crown, the white chewing part. Avoid touching the root.
  2. If it is dirty, rinse it for a few seconds with milk or saline. Do not scrub it or wrap it in a tissue.
  3. If you can, gently push it back into the socket and bite on a clean cloth to hold it there.
  4. If that isn't possible, store it in a small container of milk or saline. An adult can also hold it inside the cheek. Plain water is a poor storage choice for more than a few seconds.
  5. Get to a dentist right away.

One important exception: baby teeth should not be put back in. Reinserting a primary tooth can damage the permanent tooth developing underneath. Bring the child and the tooth to a dentist instead.

Cracked or Broken Tooth

Rinse your mouth with warm water and save any pieces you find. Hold a cold pack against the outside of your cheek to limit swelling, and avoid chewing on that side.

How serious a crack is depends on its depth. A small chip in the enamel can often be smoothed or bonded. A crack that reaches the inner part of the tooth may need a crown, and if the nerve is involved, a root canal. Cracks that extend below the gumline are the hardest to treat, which is why sharp pain when biting down, or pain when you release a bite, deserves a prompt exam.

Severe Toothache

A toothache that throbs, wakes you up, or lingers after something hot or cold usually means the problem has reached the pulp, the soft tissue inside the tooth that contains the nerve. Deep decay and infection are the most common causes.

Until you can be seen:

  • Rinse with warm salt water
  • Floss gently around the tooth in case something is stuck
  • Take an over-the-counter pain reliever as directed on the label
  • Do not place aspirin directly on the gums, since it can burn the tissue

Be cautious if a severe toothache suddenly stops hurting. That can mean the nerve has died while the infection remains. The tooth still needs to be examined.

Swelling and Gum Abscesses

A bump on the gum that looks like a pimple, a bad taste that keeps coming back, or swelling around one tooth can point to an abscess, which is a pocket of infection. An abscess does not heal by itself. Draining it at home, or squeezing it, can spread the infection.

Rinsing with salt water can ease discomfort, but this is a same-day dental problem, and an ER problem if the swelling spreads or you develop a fever.

Wisdom Tooth Flare-Ups

Soreness, swelling, or a tight jaw at the very back of the mouth, especially in the late teens and twenties, is often caused by a wisdom tooth that is partly erupted. Food and bacteria collect under the flap of gum covering it, and the area becomes inflamed.

Warm salt water rinses and careful cleaning help in the short term. If the flare-ups keep returning, or you can't open your mouth fully, a dentist or oral surgeon can evaluate whether the tooth should be removed.

Why It Helps to Plan Ahead

The worst time to search for help is when your face is swollen and you can't think clearly. It is worth knowing in advance whether your regular office sees urgent cases, and what their after-hours instructions are. A general dentist who handles emergencies, or a dedicated emergency dentist, can usually treat cracked teeth, infections, and knocked-out teeth, and refer out only when a case needs a specialist.

Save the number in your phone, and keep a small container and some saline in a first-aid kit at home.

Prevention

Many emergencies are the end of a slow problem. Cracked teeth often start as large, aging fillings. Severe toothaches often start as cavities that weren't caught. A few habits lower the odds:

  • Wear a mouthguard for contact sports and recreational leagues
  • Stop chewing ice and hard candy
  • Don't use your teeth to open bottles, bags, or packaging
  • Ask about a night guard if you grind your teeth
  • Keep up with regular checkups so small problems are found while they are small

Nobody plans for a dental emergency. But knowing the difference between "today," "this week," and "go to the ER" takes much of the panic out of the moment, and acting quickly is often what saves the tooth.

Read more…

While sports are great for health, they may expose athletes to unexpected injuries. A collision while playing football, a ski accident, or a fall while cycling can cause serious injury, and your teeth are often the first impact. While visible cuts and bruises are easy to manage, internal dental injuries can often lead to persistent pain, swelling, or complications over time.

When an accident occurs during sports, prompt, informed action is essential to protect the injured tooth and reduce the risk of long-term complications. Knowing how to handle a sports dental injury can make a meaningful difference to your smile.

Whether you are an athlete, coach, student, or sports trainer, understanding basic dental first aid can help save your teeth and minimize the risk of serious dental injuries.

Common Types of Sports-Related Dental Injuries and Their First Aid

Dental injuries can range from minor enamel wear to complete tooth removal or internal damage. Recognizing the problem is crucial to determining the right response.

1. Chipped or Fractured Teeth

A direct impact to the mouth can chip the enamel or break a portion of the tooth. Losing small chips from the surface may cause little discomfort, but deeper fractures or cracks can expose sensitive inner tissues and cause significant pain or long-term complications.

First aid: Rinse the mouth gently with clean water to remove any dislodged fragments or chips. If there is bleeding or swelling, apply a gentle cold compress. Schedule a quick dental examination, especially if you experience significant pain, sensitivity, or visible damage to a tooth.

If you find a large tooth fragment, store it in a clean container and take it to a sports injury dentist.

2. Knocked-Out Tooth (Avulsion)

A completely knocked-out permanent tooth is a serious dental emergency, one that needs immediate professional intervention. However, how you act within 30-60 minutes of the accident determines whether the tooth can be saved.

First aid for a knocked-out permanent tooth:

  • Find the tooth and pick it up by the crown. Avoid touching the root.
  • If dirty, rinse it gently with water. Do not scrub or scrape the root.
  • If it is a permanent tooth, try reinserting it into the socket. Never force it, though.
  • If it doesn’t go, store the tooth in milk or saline solution and seek emergency dental care immediately.

Do not try reinserting a baby tooth. If the injured person is unconscious or has difficulty breathing, seek emergency medical care and do not attempt tooth reimplantation.

The best chance of saving a knocked-out tooth is within the first 30 to 60 minutes, so avoid wasting time and visit a dentist as soon as possible.

3. Loose or Displaced Teeth

If a sports accident leaves a tooth loose, crooked, pushed inward, pulled outward, or shifted sideways, it may indicate damage to supporting tissues or the root.

First aid: Do not wiggle the tooth or try to fix it yourself. Avoid chewing on the affected side. If there’s swelling or bleeding, use a cold compress. Seek urgent dental assessment. A dentist can reposition and stabilize the tooth, depending on how quickly you visit.

4. Injuries to the Lips, Gums, and Jaw

Sports accidents can also cause injuries to the mouth, gums, lips, and jaw.

First aid: If you notice blood, apply gentle pressure using clean gauze. Use a cold compress if there’s swelling.

Persistent bleeding, swelling that worsens, a possible jaw fracture, difficulty biting, speaking, or opening the mouth, altered bite alignment, or throbbing pain may indicate serious damage and require urgent medical evaluation.

What Not to Do After a Dental Injury

Not knowing what to do following a sports impact can sometimes lead to actions that worsen the injury. Avoid these common mistakes:

  • Do not waste time: Rather than trying to treat the symptoms on the spot or at home, visit a dentist as soon as you can to check for serious damage.
  • Do not scrub a knocked-out tooth or root: This can damage the delicate root cells and make re-inserting difficult.
  • Do not store an avulsed tooth in plain water: It can damage root-surface cells. Use milk or saliva instead.
  • Do not force a tooth back into position: Try repositioning it gently, but never force it.
  • Do not ignore persistent pain or discoloration: These can indicate damage to the tooth's nerve or blood supply. See a dentist immediately.
  • Do not return to play immediately: Seek dental or medical clearance first, particularly if there’s pain, bleeding, or swelling.

Conclusion: Being Prepared Can Save Your Tooth

Dental trauma during sports is not always preventable, but the damage can be reduced through quick, appropriate action, including prompt first aid and timely professional treatment. Whether it’s a minor fracture or an avulsed permanent tooth, knowing the next steps can help you control the damage until a dentist is accessible.

However, no first aid can replace prevention and preparation, especially during sports. Proper safety gear, custom mouthguards, informed help, accessible medical aid, and routine dental care can help minimize the risk of accidents or serious damage if accidents do occur.

When a sports-related dental injury occurs, act promptly and seek professional care as soon as possible.

Read more…
Learn why ranking at the top of Google does not always lead to more dental patients, and how website content, reviews and front desk communication can influence whether search visibility turns into appointments.
Read more…

Finding the right dentist to restore your missing teeth can feel overwhelming, especially with so many options out there. Whether you are looking to replace an old, shifting set or planning to get your first prosthetic, choosing a reliable local provider supports long-term wellness. You need someone with solid industry experience, a gentle, patient-first approach, and the ability to create customized dentures that fit you perfectly. Proximity is also an important factor, since you wouldn't want to drive very far from your home.

Fortunately, the Lynnwood area provides access to some wonderful dental professionals and specialized denture labs right here in the Pacific Northwest. Local dentists in Lynnwood are making it easier than ever for residents to get modern, natural-looking dentures with fast turnaround times.

To help you find the right option for your needs, we’ve rounded up this well-researched list of the best denture providers in Lynnwood, highlighting their specialties/services, patient reviews, and on-site lab availability so you can make an informed decision toward a confident smile.

Dentists That Make Dentures in Lynnwood

1. Lynnwood Dental Studio

Google Rating: 4.7 (138)

Address: 5017 196th St SW #202, Lynnwood, WA 98036, United States

Highlight: Provides comprehensive, affordable tooth replacement, including complete and partial dentures and implant-supported dentures. The chief dentist, Dr.Suman Chintala, has over two decades of experience in family, emergency, and cosmetic dentistry.

Patient Feedback: Patients appreciate the quick and effective results of their custom full and partial dentures, noting that the professional, caring staff makes treatments comfortable and easy to understand.

How to Contact: +1 425 778 5665

2. Excel Dental & Dentures

Rating: 5.0 (162)

Address: 20015 Hwy 99 Ste d, Lynnwood, WA 98036

Highlight: Specializes in same-day or emergency dentures. Other services include free denture consultations, immediate appointments, flexible partial dentures, flippers, and complete custom dentures.

Patient Feedback: Patients highlight the dentist’s ability to create natural-looking, perfectly fitting, and comfortable custom dentures with a quick turnaround time of under three weeks.

How to Contact: +1 425-774-8590

3. Affordable Dentures & Implants

Rating: 4.7 (124)

Address: 2701 184th St SW, Lynnwood, WA 98037

Highlight: provides budget-friendly tooth replacement options, including dentures. Services include custom dentures, dental implants, and extractions. Having an on-site lab provides fast, same-day care.

Patient Feedback: Patients love the supportive staff, excellent results, and significant cost savings compared to peers. A few patients note that achieving the perfect fit may require multiple adjustments.

How to Contact: +1 771-772-1433

4. Allen Dental & Denture Clinic

Rating: 4.6 (11)

Address: 6226 196th St SW Ste 1B, Lynnwood, WA 98036

Highlight: Known for professional restorative and cosmetic care, with expertise in personalized full, partial, and implant-supported dentures.

Patient Feedback: Patients report quick relief from previous loose-fitting pain, efficient single-day treatments, compassionate staff, and a completely non-judgmental environment.

How to Contact: +1 425-670-8670

5. The Dental Atelier

Rating: 4.9 (479)

Address: 19020 33rd Ave W #380, Lynnwood, WA 98036

Highlight: A modern, tech-driven practice providing expert restorative care, specializing in custom full, partial, and advanced implant-supported dentures.

Patient Feedback: Customers praise the exceptional denture care, including Dr. Kunal Narang's helpful guidance in selecting options, and the precise fit of the dentures.

How to Contact: +1 425-774-0111

6. Lynnwood Dental Excellence

Rating: 4.6 (542)

Address: 4202 198th St SW Ste 3, Lynnwood, WA 98036

Highlight: Provides quality restorative dentistry, including custom full and partial dentures. Dr. Michael Yeh, D.D.S., M.S.D., is an internationally recognized specialist with over 28 years of experience.

Patient Feedback: Patients appreciate friendly, polite, and knowledgeable staff, comfortable denture placements, and the quality of their new prosthetics.

How to Contact: +1 425-775-0651

7. Cedar View Dental

Rating: 5.0 (487)

Address: 19718 68th Ave W STE F, Lynnwood, WA 98036, United States

Highlight: Provides complete restorative care in Lynnwood, specializing in customized full, partial, and implant-supported dentures and using advanced techniques to fully restore natural function and aesthetics.

Patient Feedback: Patients praise their exceptional, compassionate care, describing Dr. Jonnes as gentle with top-tier, stress-free denture services tailored to elderly patients and those with dental anxiety.

How to Contact: +1 425-778-2126

Comparison of Top Dentists That Make Dentures in Lynnwood

Practice

Rating

On-Site Lab?

Core Highlight

Lynnwood Dental Studio

4.7 / 5

No

Affordable, comprehensive dentures

Excel Dental & Dentures

5.0 / 5

Yes

Quick 2-week turnaround options

The Dental Atelier

4.9 / 5

No

Excellent personalized guidance

Affordable Dentures

4.7 / 5

Yes

Implant-supported denture focus

Lynnwood Dental Excellence

4.6 / 5

No

Certified prosthodontist specialist

Allen Dental Clinic

4.6 / 5

Yes

Same-day standard repairs

Cedar View Dental

5.0 / 5

No

Advanced techniques; comfortable care


Conclusion

Your smile is important, so is choosing the right dentist when you need new dentures. Investing in dentures is a crucial life decision. Take your time to evaluate your options. Most patients prefer local dentists in Lynnwood to ensure hassle-free appointments, adjustments, and maintenance. Other factors to consider include the dentist’s experience, methods/technology, and patient reviews. If you need dentures urgently, look for emergency or same-day services.

Hope this list helps you narrow down your options. If you have questions or are ready to make an appointment, reach out to one of these top-rated Lynnwood denture clinics directly to take the first step toward a lasting smile.

Read more…
Learn why an expensive dental website does not always lead to more bookings, and why patient reviews, real team photos, useful treatment information and the overall patient experience can matter more than visual polish.
Read more…
Learn what prospective patients want to see in dental before-and-after photos, and how faces, natural expressions and consistent photography can make treatment results easier to understand.
Read more…

thumb-sucking-girl-dr.-dunne-a-childs-best-smile-girl-sucking-thumb.jpg

Parents often hear that thumb-sucking will "ruin" a child's teeth, and just as often hear that kids grow out of it and it doesn't matter. The truth sits in between. Many common childhood habits are perfectly normal at one age and potentially harmful at another. This article explains how habits like thumb-sucking, pacifier use, tongue thrusting, and mouth breathing affect developing teeth and jaws, when to be concerned, and how dental professionals help.

Why Habits Affect the Mouth

A child's jaws and teeth are shaped not only by genetics but by the forces placed on them every day. The tongue, lips, and cheeks create a balance of pressure that guides where teeth erupt and how the jaws grow. When a habit repeatedly changes those forces over months or years, the teeth and bones gradually adapt to the new pressure.

The three factors that matter most are duration (how many hours a day), frequency (how often), and intensity (how forcefully). A child who sucks a thumb gently while falling asleep is very different from one who sucks vigorously for hours each day.

Thumb and Finger Sucking

Sucking is a natural reflex, and it comforts babies and toddlers. Most children stop on their own between ages two and four. Problems are more likely when the habit continues as the permanent front teeth start to come in, usually around age six.

Prolonged, intense sucking can lead to:

  • Anterior open bite, where the front teeth don't meet when the back teeth are closed
  • Protruding upper front teeth, which are more prone to injury
  • A narrow upper jaw, which can cause a posterior crossbite
  • Changes in how the tongue rests and moves during swallowing and speech

Pacifiers

Pacifiers can cause similar changes, although the habit is often easier to stop because the pacifier can be taken away. Many pediatric dental professionals encourage weaning well before the permanent teeth erupt, and ideally in the toddler years. Never dip a pacifier in honey or sugar, which dramatically increases cavity risk.

Tongue Thrust

Normally, the tongue rests against the roof of the mouth and pushes upward and back during swallowing. With a tongue thrust, the tongue pushes forward against or between the front teeth. That repeated pressure can keep an open bite from closing and can push teeth forward. Tongue thrust often goes hand in hand with a lingering sucking habit or with mouth breathing, and it sometimes needs help from a speech-language pathologist or myofunctional therapist.

Mouth Breathing

This habit is easy to overlook but can have significant effects. Children who breathe mostly through the mouth often do so because of enlarged tonsils or adenoids, allergies, or nasal blockage. When the mouth stays open, the tongue drops away from the palate, removing a force that helps the upper jaw widen.

Over time, chronic mouth breathing has been associated with:

  • A narrow, high-arched palate
  • Crowded teeth and crossbites
  • A longer lower face
  • Dry mouth, which raises cavity and gum inflammation risk
  • Snoring and disrupted sleep, which can affect behavior, attention, and growth

Signs to watch for include snoring, lips apart at rest, dark circles under the eyes, frequent congestion, restless sleep, and daytime fatigue. Because the cause is often in the airway, a dentist may recommend an evaluation by a pediatrician or an ear, nose, and throat specialist.

Why Both Specialists Matter

Habit-related problems sit at the intersection of two dental specialties. A pediatric dentist sees a child every six months from infancy and is often the first to notice early changes in the bite, a habit that isn't fading, or signs of mouth breathing. An orthodontist evaluates how the jaws are growing and corrects the effects once they develop.

The American Association of Orthodontists recommends an orthodontic evaluation around age seven. For habit-related issues, that timing is especially useful, because many problems caused by habits are easier to correct while a child is still growing. A practice with both an orthodontist & pediatric dentist on the same team can monitor a habit, step in when needed, and coordinate care without passing the family between offices.

How Habits Are Addressed

Positive reinforcement first. For young children, praise, sticker charts, and small rewards for habit-free days are often more effective than scolding. Many children suck their thumbs when tired, bored, or anxious, so addressing the trigger helps.

Reminders. Bandages on the thumb, special gloves at night, or bitter-tasting nail coatings recommended by a dentist can serve as gentle reminders for older children who want to stop.

Habit appliances. If a child wants to stop but can't, a dentist or orthodontist may place a small appliance behind the upper front teeth that makes sucking less satisfying and reminds the tongue where to rest.

Palatal expansion. When a habit or mouth breathing has narrowed the upper jaw, an expander can widen it while the growth seam in the palate is still flexible, typically before the early teen years. This can correct a crossbite and create room for crowded teeth.

Myofunctional therapy. Exercises that retrain the tongue and lip muscles can support orthodontic treatment for tongue thrust and open bites.

Airway coordination. If enlarged tonsils or allergies are causing mouth breathing, treating the underlying cause may be the most important step.

What Parents Can Do

  • Don't panic about sucking habits in babies and toddlers. They're normal.
  • Begin gently discouraging the habit as a child approaches preschool age.
  • Watch for mouth breathing and snoring at any age, and mention them to your child's dentist and pediatrician.
  • Keep up with six-month dental visits so changes are spotted early.
  • Schedule an orthodontic evaluation around age seven, even if the teeth look fine.

The Bottom Line

Most childhood habits are harmless when they fade on time. When they persist, especially past the point when permanent teeth arrive, they can reshape the bite and even the jaws. Early attention from a pediatric dentist, timely orthodontic evaluation, and a supportive approach at home can prevent small problems from becoming bigger ones and help children grow into healthy, well-aligned smiles.

Read more…

For decades, a "dental implant" meant a titanium post. Titanium still accounts for the vast majority of implants placed today, and it has an excellent track record. But a growing number of patients ask about zirconia, a ceramic material that offers a metal-free alternative. Both can replace missing teeth successfully, and each has real advantages and limitations. This article compares the two so you can have an informed conversation with your dentist.

A Quick Primer on Implants

A dental implant replaces the root of a missing tooth. It's placed in the jawbone, where bone gradually bonds to its surface. Once healed, it supports a crown, a bridge, or a full-arch set of teeth. Implants help preserve the jawbone, don't rely on neighboring teeth for support, and can last for many years with good care.

The material the implant is made from affects how it bonds with bone, how it looks, how it handles stress, and how the final tooth is attached.

Titanium Implants

Titanium implants have been used since the 1960s and have been studied extensively. They are typically made from commercially pure titanium or titanium alloys.

Strengths:

  • Long-term research. Decades of clinical data show high success rates over ten years and beyond.
  • Strength and flexibility. Titanium tolerates chewing forces well and is very resistant to fracture.
  • Two-piece design. Most titanium implants have a separate abutment, the connector between implant and crown. That gives the dentist flexibility to adjust angles and replace components if needed.
  • Wide range of options. Nearly every size, shape, and restorative system is available.

Limitations:

  • Gray show-through. In patients with thin gums, especially in the front of the mouth, a gray shadow can sometimes appear at the gumline, or become visible if the gums recede.
  • Metal sensitivity. True titanium allergy appears to be rare, but some patients have documented sensitivities or simply prefer to avoid metal in their bodies.
  • Corrosion particles. Researchers continue to study the small particles and ions that can be released from titanium surfaces over time and their possible role in inflammation around implants.

Zirconia Implants

Zirconia is a white, tooth-colored ceramic, specifically yttria-stabilized zirconium dioxide. It has been used in dentistry for crowns and bridges for years and has been used for implants more recently.

Strengths:

  • Metal-free. A natural fit for patients seeking a biocompatible, non-metal option, as offered by practices focused on Biodental Holistic Dentistry.
  • Aesthetics. The white color blends with natural teeth and won't cause a gray shadow at the gums.
  • Soft-tissue response. Several studies suggest that zirconia may accumulate less plaque than titanium and that gums tend to respond well to it.
  • No galvanic reaction. Because it isn't metal, zirconia doesn't conduct electricity or interact with other metals in the mouth.

Limitations:

  • Less long-term data. Short- and medium-term results are encouraging, but the research base is much smaller than for titanium.
  • More brittle. Ceramic is strong under compression but less forgiving under bending forces. Fracture is uncommon with modern designs but more of a concern than with titanium, particularly in patients who grind heavily.
  • Design limitations. Many zirconia implants are one-piece, meaning the implant and abutment are a single unit. That limits adjustments and can make healing more sensitive to forces during the early months. Two-piece zirconia systems are available and becoming more common.
  • Fewer options. Fewer sizes and restorative components exist, and fewer clinicians are trained in placing them.
  • Cost. Zirconia implants often cost more.

Side-by-Side Comparison

Factor

Titanium

Zirconia

Color

Gray metal

White, tooth-colored

Research history

50+ years

Shorter, growing

Fracture resistance

Very high

High, but more brittle

Design

Mostly two-piece

One-piece and two-piece

Metal-free

No

Yes

Gum aesthetics with thin tissue

Possible gray show-through

No gray show-through

Availability

Nearly universal

More limited

Typical cost

Lower

Higher


Who Might Prefer Zirconia?

Zirconia can be a good choice for patients who:

  • Have a documented metal allergy or sensitivity
  • Strongly prefer a metal-free mouth for personal or holistic reasons
  • Have thin gum tissue in a highly visible area
  • Are replacing front teeth where aesthetics are critical

Titanium may be the better choice for patients who:

  • Grind or clench heavily
  • Need implants placed at angles or require complex full-arch restorations
  • Need bone grafting with immediate implant placement in challenging sites
  • Want the option with the longest track record

The Role of Planning and Technology

Regardless of material, implant success depends on careful planning. 3D cone-beam imaging shows bone volume and the location of nerves and sinuses. Digital scans and guided surgery, including robotic-assisted placement at some practices, help position implants with high precision. Healthy gums, adequate bone, good blood sugar control, and not smoking all improve outcomes.

Questions to Ask Your Dentist

  • Which material do you recommend for my situation, and why?
  • How many zirconia implants have you placed, and what has your success rate been?
  • Is the zirconia implant one-piece or two-piece?
  • Will I need bone grafting first?
  • What are the full costs, including the crown?
  • How will we protect the implant if I grind my teeth?

Caring for Any Implant

Implants can't get cavities, but the gums and bone around them can become inflamed, a condition called peri-implantitis. Daily brushing, cleaning between teeth with floss or interdental brushes, regular professional cleanings, and a night guard if you grind all help protect your investment.

The Bottom Line

Titanium remains the proven standard, with decades of evidence behind it. Zirconia offers a metal-free, highly aesthetic alternative that suits many patients well, with growing research support. The best choice depends on your bite, your bone, your aesthetic goals, and your personal priorities. A thorough evaluation and an honest conversation about the trade-offs will help you choose the implant that fits you.

Read more…

what-are-the-3-types-of-dental-implants.jpg

Dental implants are widely considered the most natural-feeling way to replace missing teeth. But many people who come in for an implant consultation hear an unexpected word: grafting. It turns out that the bone under a missing tooth doesn't just sit there waiting. It changes, often dramatically, and that affects whether an implant can be placed. This article explains why bone matters, how grafts and sinus lifts work, and what patients should know before starting treatment.

Why Bone Is the Foundation of an Implant

An implant is a small post, usually titanium, that replaces a tooth's root. After it's placed, the surrounding bone grows onto its surface in a process called osseointegration. Once that bond forms, the implant can support a crown, bridge, or denture under full chewing forces.

For that to happen, the implant needs to be surrounded by enough healthy bone, typically with at least a millimeter or two of bone on every side. Too little height and the implant might reach a nerve or the sinus. Too little width and the implant can be exposed through the side of the ridge.

What Happens to Bone After a Tooth Is Lost

The jawbone around a tooth exists largely to support that tooth. When the tooth is removed, the body no longer gets the stimulation from chewing, and the bone begins to remodel and shrink.

Research has shown that the ridge can lose a substantial share of its width within the first year after an extraction, with most of that change happening in the first few months. Over years, the loss continues. That's why people who have worn dentures for a long time often notice their dentures getting looser and their lower face looking shorter.

Other causes of bone loss include:

  • Advanced gum disease
  • Infections or cysts
  • Trauma to the jaw
  • Long-term denture wear
  • Developmental conditions

Types of Bone Grafts

A bone graft adds material to the jaw to rebuild lost volume. Over time, the body replaces or incorporates that material with its own bone. Grafts come from several sources:

Autografts use the patient's own bone, often taken from another area of the jaw. They contain living cells and are considered the gold standard for regeneration, but they require a second surgical site.

Allografts come from human donor bone that has been processed and sterilized by a tissue bank.

Xenografts are derived from animal sources, most often bovine bone, and act as a long-lasting scaffold.

Alloplasts are synthetic materials such as calcium phosphate compounds.

Surgeons often combine materials and cover the graft with a membrane that keeps soft tissue out while bone forms underneath. Some practices also use growth factors or platelet concentrates prepared from the patient's own blood to support healing.

Common Grafting Procedures

Socket preservation. Graft material is placed immediately after an extraction to limit the shrinkage that would otherwise occur. It's one of the simplest ways to protect the option of an implant later.

Ridge augmentation. When the ridge is too thin or short, bone is added to rebuild its width or height before or during implant placement.

Block grafts. For larger defects, a solid piece of bone is secured to the jaw with small screws.

Guided bone regeneration. Particulate graft material and a barrier membrane are used to grow bone in a specific area.

The Sinus Lift

In the upper back jaw, the maxillary sinus sits directly above the roots of the premolars and molars. After those teeth are lost, two things tend to happen: the bone shrinks from below, and the sinus expands downward. The result can be only a few millimeters of bone, far too little for an implant.

A sinus lift, or sinus augmentation, solves this by gently raising the thin membrane that lines the floor of the sinus and placing graft material in the space created. There are two main approaches:

  • Lateral window technique. A small opening is made in the side wall of the sinus to access the membrane. This is used when a lot of added height is needed.
  • Crestal approach. The membrane is lifted through the same site where the implant will go. This is less invasive and used when only a modest increase is needed.

Recovery usually involves some swelling and congestion. Patients are asked to avoid blowing their nose forcefully, sneezing with the mouth closed, and air travel for a short time.

Timing: Staged vs. Simultaneous

Sometimes the graft and the implant are placed in the same appointment. In other cases, the graft is allowed to heal for several months before the implant goes in. Larger grafts and sinus lifts that add a lot of height are more likely to be staged. Healing times commonly range from four to nine months, depending on the size of the graft and the materials used.

Why a Specialist's Experience Matters

Grafting and sinus lifts are technique-sensitive. Planning requires 3D cone-beam imaging to measure bone height, width, density, and the position of nerves and sinuses. Complications such as membrane tears or graft failure are uncommon in experienced hands but more likely without extensive training. A dental implant specialist who performs grafting routinely can often turn a "you're not a candidate" into a workable plan, and can explain realistic timelines and outcomes.

When evaluating a provider, ask:

  • How many grafts and sinus lifts do you perform each year?
  • Will you take a 3D scan before planning?
  • What graft materials do you use, and why?
  • Will my graft and implant be placed together or in stages?
  • Who designs and makes the final teeth, and is the lab in-house?

Protecting Your Options

If you're facing an extraction and think you might want an implant later, ask about socket preservation at the time the tooth is removed. It's much easier to preserve bone than to rebuild it. And if you've already lost teeth, getting evaluated sooner rather than later limits how much additional bone is lost.

The Bottom Line

Bone loss after tooth loss is normal, but it doesn't have to rule out implants. Bone grafting and sinus lifts are well-established procedures that rebuild the foundation an implant needs. With careful 3D planning and an experienced surgeon, most patients who were once told they didn't have enough bone can still enjoy stable, natural-feeling implant teeth.

Read more…

how-quickly-do-teeth-move-with-invisalign.jpeg

Clear aligners have gone from a niche option to one of the most requested orthodontic treatments for adults. Their appeal is obvious: nearly invisible trays, no brackets or wires, and the freedom to take them out for meals. But aligners are a medical treatment, not a cosmetic accessory, and they work best when patients understand how they function and what they require. This article explains the science behind aligner treatment, what the process involves, and how to tell whether they're right for you.

How Teeth Move

Teeth aren't fixed rigidly in the jaw. Each root is held in its socket by the periodontal ligament, a thin layer of fibers that acts like a shock absorber. When steady, gentle pressure is applied to a tooth, the bone on the pressure side slowly breaks down and new bone forms on the opposite side. The tooth moves a fraction of a millimeter at a time.

Braces create that pressure through brackets and wires. Clear aligners do it through a series of custom plastic trays, each shaped slightly differently from the one before. When you snap in a new tray, it doesn't quite match your teeth, and that small mismatch produces the force that moves them.

From Scan to Trays: The Treatment Process

  1. Digital scan and records. Instead of messy impressions, most practices use an intraoral scanner to create a detailed 3D model of your teeth. Photos and X-rays check the health of the roots and bone.
  2. Treatment planning. Software maps out the movement of each tooth from start to finish. The dentist or orthodontist reviews and adjusts the plan, deciding how far each tooth should move per stage and in what order. This clinical judgment is the most important part of the process.
  3. Attachments. Small tooth-colored bumps may be bonded to certain teeth. They give the aligners something to grip, allowing more complex movements like rotations and tipping.
  4. Wearing the trays. Patients typically switch to a new set every one to two weeks. Check-ups every six to ten weeks confirm that teeth are tracking as planned.
  5. Refinements. It's common to need an additional series of aligners near the end to fine-tune the result. This is a normal part of treatment, not a sign that something went wrong.
  6. Retainers. Once teeth reach their final positions, retainers keep them there.

The 20-to-22-Hour Rule

The single biggest factor in aligner success is wear time. Trays need to be in the mouth 20 to 22 hours a day, which means they come out only for eating, drinking anything other than water, and brushing.

Why is it so strict? Teeth begin to drift back as soon as the pressure is removed. A tray worn only 16 hours a day spends a third of each day letting teeth relax, which slows progress, causes trays to fit poorly, and can lead to extra refinements. Patients who are consistent usually finish on schedule.

Helpful habits include:

  • Keeping the case with you at all times
  • Brushing or at least rinsing before putting trays back in
  • Limiting grazing and sipping sweet drinks throughout the day
  • Setting phone reminders for the first few weeks

Who Is a Good Candidate?

Modern clear aligners work well for many common problems:

  • Mild to moderate crowding
  • Gaps between teeth
  • Some overbites, underbites, and crossbites
  • Relapse after earlier braces treatment
  • Straightening teeth before crowns, veneers, or implants

They may be less suitable for severe crowding, large vertical movements, significant skeletal bite problems, or patients who aren't able to wear them consistently. In those cases, braces may produce a more predictable result.

Before any tooth movement, the gums and teeth need to be healthy. Untreated cavities and gum disease should be addressed first.

Brand Names and What Really Matters

Invisalign is the best-known aligner brand, but it isn't the only one. Several other systems, including some that are provided only through licensed dental professionals, use similar digital planning and custom-fit trays. The brand matters less than two things: the quality of the treatment plan and the clinician supervising it. Aligners prescribed and monitored in person by a dentist or orthodontist, with proper records and regular check-ups, are very different from mail-order systems where no one examines your mouth.

Aligners vs. Braces at a Glance


Clear aligners

Traditional braces

Visibility

Nearly invisible

Visible, though ceramic is subtle

Removable

Yes

No

Eating restrictions

None, since trays come out

Avoid hard and sticky foods

Hygiene

Easier to brush and floss

More effort around brackets

Relies on patient compliance

Heavily

Less so

Emergency visits

Rare

Occasional broken brackets

Complex cases

Some limits

Very versatile


Common Questions

Do aligners hurt? Most people feel pressure for a day or two after switching trays. It's usually milder than the soreness after a braces adjustment.

Will they affect my speech? A slight lisp is common for the first few days and fades as the tongue adjusts.

How long does treatment take? Mild cases may finish in six months. More involved cases often take 12 to 18 months or longer.

Can I drink coffee with them in? It's best to remove them. Hot drinks can warp the plastic, and sugary or acidic drinks trapped under the trays increase the risk of cavities and staining.

Do I need a retainer afterward? Yes. Without one, teeth tend to drift back. Many people wear a clear retainer at night indefinitely.

Caring for Your Aligners

Rinse trays each time you remove them, brush them gently with a soft toothbrush and cool water, and avoid hot water, which can warp them. Always store them in their case. Many lost aligners end up wrapped in a napkin on a restaurant tray.

The Bottom Line

Clear aligners move teeth through the same biology as braces, just with a different tool. They offer comfort, convenience, and discretion, but they only work if worn consistently and supervised by a qualified dental professional. If you're disciplined about wear time and your case is a good fit, aligners can deliver a straighter smile with far less disruption to daily life.

Read more…

teens-braces.jpg

Middle school and high school are when most people get braces, and there are good reasons for that timing. It's also a stage of life when looks, sports, music, and social life all feel high-stakes, so teens and parents naturally have a lot of questions. This article explains why the teen years are such a common time for orthodontic treatment, how traditional and self-ligating braces differ, and practical ways to make the months in braces go well.

Why the Teen Years Are Prime Time

By about age 12 or 13, most children have lost their baby teeth and the permanent teeth, except the wisdom teeth, have come in. That gives the orthodontist a complete set of adult teeth to work with.

Just as important, most teens are still growing. The jaws are still developing, which allows an orthodontist to correct certain bite problems, such as some overbites, by working with growth instead of against it. Once growth finishes in the late teens or early twenties, some of those same problems can only be corrected with more complex treatment or surgery.

Teens also tend to adapt quickly. Bone remodels readily at this age, and teens generally get used to the feel of braces within a week or two.

Common Problems Braces Correct

  • Crowding, when there isn't enough room for all the teeth to line up
  • Spacing, gaps between teeth
  • Overbite, where the upper front teeth overlap the lower ones too much
  • Underbite, where the lower teeth sit in front of the upper teeth
  • Crossbite, where some upper teeth sit inside the lower teeth
  • Open bite, where the front teeth don't meet when the back teeth are closed

Beyond appearance, correcting these problems makes teeth easier to clean, spreads chewing forces more evenly, and can reduce the risk of chipping protruding front teeth.

Traditional Braces

Traditional braces use brackets bonded to each tooth, an archwire that carries the force needed to move the teeth, and small elastic ties, called ligatures, that hold the wire in each bracket. The elastics come in dozens of colors, and many teens enjoy changing them to match holidays or school colors at each visit.

Metal brackets are durable and cost-effective, and they handle complex movements well.

Ceramic brackets are tooth-colored or clear, making them much less noticeable. They can be slightly more fragile and may cost more.

Self-Ligating Braces

Today's options in braces for teens also include self-ligating systems, such as Damon braces. Instead of elastic ties, each bracket has a small built-in door or clip that holds the wire. That design has a few practical advantages:

  • Fewer places for plaque to collect, since there are no elastic ties that trap food
  • Lower friction, which allows lighter, more continuous forces
  • Shorter adjustment appointments, because the orthodontist simply opens and closes the clips
  • A clear version is available for teens who want something less visible

Research comparing self-ligating and conventional braces has not consistently shown dramatically shorter total treatment times, so it's best to view self-ligating systems as a comfort and hygiene improvement rather than a shortcut. Many patients do report less soreness after adjustments.

What About Clear Aligners?

Clear aligners are an option for some teens, especially those with mild to moderate crowding or spacing. They work well only when worn 20 to 22 hours a day, which requires discipline. For more complex bites, or for teens who might forget or lose their trays, fixed braces often produce more predictable results. An orthodontist can explain which option suits a specific case.

Living With Braces: Practical Tips for Teens

The first week. Teeth usually feel sore for three to five days after braces go on and after some adjustments. Soft foods, cold drinks, and over-the-counter pain relievers help. Orthodontic wax covers any bracket that rubs against the cheeks.

Food. Hard, sticky, and chewy foods are the biggest threats to brackets: hard candy, caramel, gum, popcorn, nuts, ice, and biting straight into apples or corn on the cob. Cutting food into small pieces makes a big difference.

Cleaning. Brush after every meal, and clean between teeth daily with a floss threader, orthodontic floss, or a water flosser. Plaque left around brackets can cause white spots that remain after the braces come off.

Sports. Wear an orthodontic mouthguard for contact sports and anything involving a ball. It protects both the teeth and the inside of the lips from the brackets.

Music. Brass and woodwind players usually adjust within a couple of weeks. Wax over the front brackets helps early on.

Emergencies. A loose bracket or poking wire is rarely urgent but should be reported to the office so it can be fixed at or before the next visit. Most orthodontic offices keep simple instructions for handling these at home.

Confidence During and After Treatment

Braces are so common among teenagers that they rarely draw attention. Many teens report that the hardest part is the first week. By the time braces come off, usually after 18 to 24 months, most say they're glad they did it. Straighter teeth often bring a real boost in confidence during a stage of life when self-image matters a lot.

Retainers: The Final Step

When braces come off, the teeth are straight, but the bone and gum fibers around them need time to stabilize. Teeth also keep shifting slightly throughout life. Wearing a retainer as directed, often every night long term, protects the result. Some orthodontists also bond a thin wire behind the lower front teeth.

The Bottom Line

The teen years are an ideal time for orthodontic treatment because the permanent teeth are in and growth can still help. Traditional braces remain reliable and versatile, while self-ligating systems offer added comfort and easier cleaning. With good hygiene, some adjustments to snacking habits, and faithful retainer wear, braces can deliver a healthy, confident smile that lasts well beyond high school.

Read more…

2568149.jpg

Being told you need oral surgery can be unsettling, even when the procedure is routine. Most of that worry comes from not knowing what will happen: Will I be awake? Will it hurt? How long will I be out of commission? This guide walks through what oral surgeons do, the anesthesia choices available, the procedures people are most often referred for, and what recovery actually looks like day by day.

Who Performs Oral Surgery?

Many general dentists handle simple extractions. More complex procedures are usually referred to an oral and maxillofacial surgeon, a dental specialist who completes a hospital-based surgical residency of four to six years after dental school. Some also earn a medical degree during that training. The residency covers surgery of the mouth, jaws, and face, along with extensive training in anesthesia and managing medical emergencies.

That combination of surgical and anesthesia training is the main reason patients are referred. An oral surgeon can remove a deeply impacted tooth, place an implant, and rebuild bone, all while keeping the patient safely sedated in an office setting.

Anesthesia and Sedation Options

The right level of anesthesia depends on the procedure, your medical history, and how anxious you are.

Local anesthesia. The area is numbed with an injection, and you're fully awake. This works well for simple extractions and many implant placements.

Nitrous oxide. "Laughing gas" is breathed through a small nose mask. It takes the edge off anxiety and wears off within minutes, so many patients can drive themselves home.

Oral sedation. A prescribed pill taken before the appointment produces a relaxed, drowsy state. You'll need someone to drive you.

IV sedation. Medication delivered through a vein produces deep relaxation. Most patients remember little or nothing of the procedure. This is the most common choice for wisdom teeth removal.

General anesthesia. You're fully asleep. It's used for extensive procedures, some jaw surgeries, and patients with severe anxiety or special needs.

Some practices have a certified registered nurse anesthetist on staff who focuses entirely on monitoring the patient's breathing, heart rate, and oxygen levels while the surgeon concentrates on the procedure. It's a reasonable question to ask any practice: who will be watching my vital signs while I'm sedated?

If you'll be sedated, you'll usually be asked not to eat or drink for several hours beforehand and to arrange for a responsible adult to drive you home and stay with you for the first few hours.

The Most Common Oral Surgery Procedures

Wisdom teeth removal. Third molars often don't have room to erupt properly. Impacted wisdom teeth can cause infection, cysts, damage to neighboring teeth, and gum problems. Removal is usually easiest in the late teens and early twenties, when the roots aren't fully developed.

Surgical extractions. Teeth that are broken at the gumline, badly decayed, or have curved roots may need a surgical approach rather than a simple extraction.

Dental implants. A titanium or zirconia post is placed in the jawbone to replace a missing tooth root. After healing, a crown, bridge, or denture is attached. Full-arch techniques such as All-on-4 can replace an entire arch of teeth with as few as four implants.

Bone grafting. When bone has shrunk after tooth loss, grafting rebuilds it so an implant can be placed securely. Grafts are often placed at the time of extraction to preserve the socket.

Corrective jaw surgery. Also called orthognathic surgery, this repositions the upper jaw, lower jaw, or both to correct bites that braces alone can't fix. It's planned together with an orthodontist.

Biopsies and pathology. Suspicious sores, lumps, or discolored patches in the mouth may be sampled and sent to a lab.

Facial trauma. Oral surgeons repair fractured jaws, cheekbones, and eye sockets, and treat knocked-out teeth and facial lacerations.

Infection management. Serious dental infections that spread into the jaw or face sometimes require surgical drainage.

Same-Day Surgery: Is It an Option?

Some practices can perform a consultation and procedure on the same day, particularly for straightforward extractions and wisdom teeth, as long as the patient has followed fasting instructions and brought a driver. This saves a trip and reduces the time spent worrying. Whether it's appropriate depends on your health history, the complexity of the case, and whether insurance pre-authorization is needed.

A Realistic Recovery Timeline

Every procedure and patient is different, but after a typical wisdom tooth removal:

Day 1. Bite on gauze to control bleeding. Use ice packs on the cheeks, 20 minutes on and 20 off. Stick to cool, soft foods like yogurt, applesauce, and smoothies eaten with a spoon. Rest with your head elevated.

Days 2 to 3. Swelling usually peaks. Take pain medication as directed. Begin gentle warm saltwater rinses if your surgeon recommends them.

Days 4 to 7. Swelling and soreness steadily improve. Most people return to work or school within three to five days. Gradually reintroduce soft solid foods such as pasta, eggs, and fish.

Week 2 and beyond. The gums continue to close over the sockets. Bone fills in over the following months.

Avoiding Dry Socket

Dry socket happens when the blood clot in an extraction site dislodges or dissolves too early, exposing bone. It causes a throbbing pain that often starts two to four days after surgery and can radiate to the ear. To lower the risk:

  • Don't use straws for at least a week
  • Don't smoke or vape
  • Avoid vigorous rinsing or spitting in the first 24 hours
  • Follow all aftercare instructions from your surgeon

If you develop severe pain a few days after surgery, call the office. Dry socket is very treatable with a medicated dressing.

Questions to Ask Before Your Procedure

  • What anesthesia do you recommend for me, and why?
  • Who monitors me while I'm sedated?
  • Can the consultation and surgery happen on the same day?
  • What will the total cost be, and will you submit to my dental and medical insurance?
  • Who do I call after hours if I have a problem?
  • How many days should I plan to take off?

Final Thoughts

The phrase oral surgery sounds intimidating, but for most patients the anticipation is worse than the experience. Modern sedation keeps procedures comfortable, and most recoveries follow a predictable course of a few uncomfortable days followed by steady improvement. Choose a surgeon who explains the plan clearly, ask about anesthesia and monitoring, follow the aftercare instructions closely, and you'll be back to normal sooner than you expect.

Read more…