All Posts (5070)

Sort by

Eating-and-Drinking-with-Invisalign.jpg

The Official Rules Versus Daily Reality

Every Invisalign patient receives the same basic instructions. Remove your aligners before eating or drinking anything other than water. Brush your teeth before putting them back in. Wear them twenty to twenty-two hours per day. Simple enough on paper. But after treating thousands of patients with clear aligners, I can tell you that the real-world experience of managing food and drink with Invisalign involves far more nuance than those three bullet points suggest.

I want to give you the honest version. The version that accounts for business lunches that run long, morning coffee rituals, date nights, and the general messiness of human life. These are the things my patients ask me about behind closed doors, and I think everyone deserves straight answers before starting treatment.

The Coffee Question

Can you drink coffee with Invisalign? This is probably the single most asked question in my practice, and I understand why. For many people, coffee is non-negotiable. Here is the reality. If you drink hot coffee with your aligners in, two things will happen. First, the heat can slightly warp the plastic over time, potentially affecting the fit and effectiveness of your trays. Second, coffee will stain your aligners, turning them yellow or brown and making them far more visible on your teeth.

My recommendation is straightforward. Remove your aligners for coffee. If you drink one cup in the morning, take the trays out, enjoy your coffee, brush your teeth or at least rinse thoroughly, and put them back in. The whole process adds maybe five minutes to your morning routine. If you are someone who sips coffee for two hours straight, that is a bigger challenge. You might consider switching to drinking your coffee in a more condensed window rather than nursing it all morning.

I have had patients ask about drinking iced coffee through a straw with aligners in. While a straw reduces contact with the trays, it does not eliminate it entirely. The liquid still swishes around in your mouth. It is not the worst thing in the world if it happens occasionally, but making it a daily habit will discolor your aligners and potentially trap sugary or acidic liquid against your teeth.

What You Can Actually Eat

What can you eat with Invisalign? The beautiful answer is: anything. Unlike traditional braces, which come with a long list of forbidden foods like popcorn, caramel, hard candy, and corn on the cob, Invisalign has no food restrictions whatsoever. You simply remove your trays, eat whatever you want, clean up, and put them back.

This is one of the genuine advantages of clear aligners that I emphasize with patients. Want a steak? Go for it. Craving an apple? Bite right in. That bag of sticky caramels your coworker brought back from vacation? Help yourself. The freedom to eat without restriction is a significant quality-of-life benefit compared to traditional braces, and it is one that patients consistently cite as a major reason they chose Invisalign.

The catch, of course, is the time factor. Every eating occasion requires tray removal and reinsertion, and you need to keep your total daily wear time at twenty-two hours. That means you have roughly two hours per day allocated to eating and oral hygiene. For most people, that breaks down to about thirty to forty minutes per meal for three meals. Snacking between meals eats into that allowance quickly.

The Brushing Dilemma

In a perfect world, you would brush and floss after every single meal before reinserting your aligners. In reality, that is not always possible. You are at a restaurant, at a work meeting, at a picnic. I tell patients that the ideal is to brush, but when that is not feasible, rinsing your mouth thoroughly with water is an acceptable temporary solution. Swish vigorously for thirty seconds, rinse your aligners under water, and put them back in. Then brush properly as soon as you can.

What you should never do is eat, skip any rinsing, and immediately put your trays back over food-covered teeth. This traps food debris and sugars against your enamel for hours, which is a recipe for cavities and gum problems. The aligners essentially seal everything against your teeth, creating the perfect environment for bacteria to thrive if food particles are present.

Alcohol and Social Situations

Social drinking presents its own set of considerations. Clear spirits mixed with plain soda or water are the least problematic if you occasionally take a sip with trays in. Red wine, beer, and cocktails with sugar or coloring agents will stain aligners and should always be consumed with trays removed.

I tell patients heading to a social event to plan ahead. Remove your trays, enjoy the event, eat and drink freely, and reinsert when you get home after brushing. If the event runs three or four hours, yes, that exceeds your daily allotment. One evening here and there will not derail your treatment. It is the pattern that matters. If you are removing your trays for extended periods multiple times per week, your treatment timeline will be affected.

A practical tip: bring a small case for your aligners whenever you go out. I cannot count the number of patients who have wrapped their trays in a napkin at a restaurant and accidentally thrown them away. An aligner case in your pocket or purse prevents this surprisingly common and expensive mistake.

Hot Beverages and Temperature

Beyond coffee, patients ask about tea, hot chocolate, and soup. The same principle applies: hot liquids and aligners do not mix well. The thermoplastic material can deform with heat, even if the change is subtle. Room temperature and cold beverages are generally safe with trays in, provided they are just plain water. Anything with sugar, acid, or coloring should still be consumed with trays removed.

Plain sparkling water is a gray area. It is slightly acidic due to carbonation, but in my experience, occasional consumption with trays in does not cause problems. I would not recommend it as your all-day beverage choice, but a glass here and there is unlikely to cause any issues.

Building Sustainable Habits

The patients who manage eating and drinking most successfully with Invisalign are those who establish a routine early and stick with it. They eat structured meals rather than grazing all day. They drink their coffee in one sitting rather than sipping over hours. They carry a small kit with a toothbrush, travel toothpaste, and their aligner case wherever they go.

I also notice that patients do best when they stop thinking of the aligner routine as a burden and start thinking of it as a structure that simplifies their day. You eat at meal times, you take care of your teeth, and the rest of the time your aligners are in and working. Many patients tell me that the routine actually improved their overall dental hygiene habits because they were brushing more frequently and more mindfully than they ever had before.

The key takeaway is this: Invisalign does not restrict what you eat, only when and how you manage the process around it. With a little planning and the right mindset, the adjustment becomes second nature within the first few weeks of treatment.

Read more…

Understanding Dental Crowding

Crowding is one of the most common reasons patients walk through my door. Teeth overlap, twist, and stack up when there simply is not enough space in the jaw for everything to sit neatly in a row. It can range from mild, where one or two teeth are slightly rotated, to severe, where teeth are significantly displaced and layered. For years, traditional braces were considered the only reliable option for anything beyond minor crowding. That has changed substantially.

Can Invisalign fix crowded teeth? Yes, it can, and it does so routinely in my practice. Clear aligners have evolved significantly over the past decade. The technology behind treatment planning, the materials used in the trays, and the ability to use attachments and auxiliary features have made Invisalign a viable option for moderate and even many severe crowding cases. However, the answer comes with important nuances that every patient should understand before choosing a treatment path.

How Aligners Create Space

When teeth are crowded, the fundamental problem is a space deficit. There is not enough room for all teeth to align properly. Invisalign addresses this through several mechanisms, and the treatment plan typically uses a combination of them depending on the severity of your case.

The first and most common approach is called interproximal reduction, or IPR. This involves carefully removing tiny amounts of enamel from between specific teeth to create small increments of space. We are talking about fractions of a millimeter at each site, well within safe limits and completely painless. Across multiple teeth, these small reductions can add up to several millimeters of total space gained. I explain it to patients by comparing it to sanding the edges of puzzle pieces so they fit together without overlapping.

The second mechanism is arch expansion. Aligners can gradually widen the dental arch, particularly in the premolar region, to create additional room. This is done slowly and predictably, and the clear plastic trays are surprisingly effective at producing this type of movement.

The third approach is proclination, which means tipping the front teeth slightly forward to create more room along the arch. This is used judiciously because excessive proclination can look unnatural and may not be stable long term. A good treatment plan balances all three approaches to achieve the best result.

Mild Versus Moderate Versus Severe

For mild crowding, where teeth are off by one to three millimeters, Invisalign is exceptionally effective. These cases are often straightforward, require fewer trays, and finish quickly. Most mild crowding cases can be resolved in four to six months.

Moderate crowding, in the range of four to six millimeters of discrepancy, is where the treatment plan becomes more involved. These cases typically require attachments, which are small tooth-colored bumps bonded to certain teeth that give the aligners something to grip. They also often require IPR at multiple sites and may involve more trays and a longer treatment timeline. I treat moderate crowding with Invisalign regularly, and the results are excellent.

Severe crowding, generally seven millimeters or more, is where the conversation gets more nuanced. Can Invisalign handle it? In many cases, yes, but not all. Severe crowding sometimes involves teeth that are so displaced that an extraction may be necessary to create enough space. Invisalign can absolutely be used in extraction cases, but the treatment is more complex and requires careful planning. Some severe cases with significant vertical displacement of teeth or extreme rotations may still be better served by traditional braces, at least for part of the treatment.

Treatment Duration for Crowding Cases

How long does Invisalign take for crowding? This is one of the most common questions I hear, and the answer depends on severity. For mild crowding, treatment typically ranges from four to eight months. Moderate crowding usually takes twelve to eighteen months. Severe crowding cases can take eighteen to twenty-four months or longer, particularly if extractions are involved or if the treatment plan includes sequential movements that must happen in a specific order.

I always tell patients that these timelines assume good compliance, meaning you are wearing your aligners for twenty to twenty-two hours per day and switching trays on schedule. Patients who wear their trays less consistently will see their treatment timelines extend. I have had patients turn a twelve-month case into an eighteen-month case simply by being inconsistent with wear time.

Attachments and Crowding

If your crowding is anything beyond mild, you will almost certainly have attachments placed on some of your teeth. I want to set realistic expectations here because many patients choose Invisalign specifically for its invisibility, and attachments do add some visibility to the treatment. They are tooth-colored and relatively small, but they are noticeable up close.

Attachments are essential for crowding cases because they provide the leverage and grip points that allow aligners to rotate teeth, extrude them, or move them bodily rather than just tipping them. Without attachments, aligners would simply slide over severely crowded teeth without producing the precise movements needed. Think of them as handles that let the aligner do its work effectively.

When Braces Might Be the Better Choice

I believe in being honest with patients. There are crowding situations where I will recommend braces over Invisalign, or suggest a combination approach. Teeth that are severely rotated, particularly premolars and canines, can be challenging for aligners alone. Cases where teeth are impacted or partially erupted typically need braces. Patients who know they will struggle with compliance, removing and inserting trays consistently, may get better results with fixed braces that work around the clock without patient cooperation.

That said, these situations represent a minority of crowding cases in my practice. The vast majority of patients with crowded teeth, even those with moderate to moderately severe crowding, are excellent candidates for Invisalign. The technology has reached a point where the deciding factor is often patient preference rather than clinical limitation.

What to Expect During Treatment

Treating crowding with aligners is not a perfectly smooth process. Some trays will feel tighter than others, particularly those responsible for the biggest movements. You may notice that certain teeth feel sore for a few days after switching trays, then settle down. This is normal and expected. Your orthodontist will monitor your progress at regular check-in appointments and may make adjustments to the plan if teeth are not tracking as predicted.

Refinement trays are common in crowding cases. After you finish your initial set of aligners, your orthodontist will likely take new scans and order additional trays to fine-tune the result. This is not a failure of the treatment. It is a normal part of the process, especially for more complex crowding. I set this expectation early so patients are not discouraged when they learn they need another round of trays.

The end result, though, is worth the journey. Patients who started with significantly crowded teeth and finish with a beautifully aligned smile consistently tell me it was one of the best decisions they ever made. The fact that they achieved it without metal brackets and wires makes it even more satisfying for them.

Read more…

The Honeymoon Phase Is Real, But So Is the Adjustment

How-long-do-you-wear-your-first-set-of-Invisalign-trays-1296x500.jpg

I hand patients their first set of Invisalign trays with a mix of excitement and gentle warning. On one hand, they are starting a journey toward the smile they have always wanted. On the other hand, I know the next fourteen days will involve a learning curve that no brochure fully prepares you for. I have worn aligners myself, so I speak from both professional and personal experience when I say the first two weeks are their own unique chapter in the Invisalign story.

What is it like to wear Invisalign? The honest answer is that it feels strange at first, then mildly annoying, then completely normal. But that progression takes time, and the first couple of weeks are where most of the strangeness lives. Let me walk you through what actually happens so you know what to expect.

The First Day and Night

When you first snap in your aligners, you will feel pressure. Not sharp pain, but a firm, squeezing sensation across your teeth. It is the feeling of plastic that has been engineered to move your teeth from where they are to where they need to be. Some patients describe it as tightness, others say it feels like their teeth are being hugged. I tell patients to put their first trays in at night, ideally right before bed. This way, the initial hours of adjustment happen while you sleep, and by morning the most intense pressure has already begun to fade.

Does Invisalign hurt the first week? For most patients, I would describe the sensation as discomfort rather than true pain. On a scale of one to ten, most people rate it between a two and a four during the first few days. It is comparable to the soreness you feel after a tough workout, except it is in your mouth. Over-the-counter pain relievers like ibuprofen can take the edge off, and cold water or smoothies feel soothing during those initial days.

Talking with Trays In

Nobody warns you about the lisp. It is temporary, it is minor, but it is real. For the first few days, you may notice a slight change in the way certain sounds come out of your mouth. The S and TH sounds are most commonly affected. I had a patient who was a trial attorney, and she was horrified the first morning she tried to practice her opening statement. By day four, she told me she could not even notice it anymore.

The lisp resolves because your tongue adapts remarkably quickly. Within three to five days, most patients report that their speech sounds completely normal. Reading aloud or talking more during those first days actually speeds up the adaptation. Your tongue simply needs practice navigating around the new plastic in your mouth.

The Eating and Drinking Routine

Here is where the real lifestyle adjustment happens. You need to remove your aligners every time you eat or drink anything other than plain water. That sounds simple until you realize how many times a day you casually sip coffee, snack on something, or grab a handful of trail mix. Suddenly, every bite of food requires a removal, eating, brushing, and reinsertion routine.

During the first week, this routine feels tedious. Patients tell me it takes them fifteen to twenty minutes from start to finish: removing trays, eating, brushing teeth, rinsing trays, and putting them back in. By the second week, most people have it down to five or seven minutes. You get faster at everything, from popping the trays out to brushing efficiently.

Some patients find that they snack less simply because the hassle of removing and reinserting trays is not worth it for a handful of crackers. I have had more than one patient tell me they accidentally lost a few pounds in the first month. That is not the goal, of course, but it is a commonly reported side effect of the routine.

Dry Mouth and Excess Saliva

Your mouth does not know what to make of the aligners at first. Some patients experience dry mouth because they unconsciously breathe through their mouth more, while others produce excess saliva as their body tries to figure out what this foreign object is. Both responses are normal and both settle down within the first week or so.

I recommend keeping a water bottle with you at all times during those early days. Staying hydrated helps with both dry mouth and the general adjustment. Some patients find that their lips feel a bit dry or chapped in the first week as well, so a good lip balm is worth having on hand.

Soreness When Removing Trays

Taking your aligners out will be awkward at first. You have not yet developed the technique, and your fingernails may feel too short for the task. Many patients find that starting from the back molars on one side and working forward is the easiest approach. There are also small plastic tools called aligner removal hooks that can help if you struggle.

Your teeth may feel tender when you first remove the trays, especially during the first few days of a new set. Biting into something immediately after removal can feel odd because your teeth have been under constant gentle pressure. This tenderness is completely temporary and diminishes significantly by the end of the first week.

Sleep and Nighttime Wear

Most patients adjust to sleeping with aligners faster than they expect. The first night might feel unusual. You may notice you clench slightly or wake up aware of the trays. By the third or fourth night, most people forget they are wearing anything at all. If you tend to grind your teeth, the aligners actually serve as a protective barrier, similar to a night guard.

I do hear from occasional patients that they produce more saliva during sleep in the first few nights, which can be mildly annoying. A towel on the pillow helps if this is an issue, and it typically resolves within the first week.

The Emotional Arc

I think it is worth acknowledging the emotional component of those first two weeks. Around day three or four, many patients hit a low point. The novelty has worn off, the routine feels burdensome, their teeth are sore, and they start wondering if they made the right choice. This is entirely normal. I call it the day-four dip, and I tell every patient about it in advance so they recognize it when it happens.

By the end of the second week, something shifts. The routine becomes automatic. The soreness has faded. Your speech is normal. You can remove and insert trays without thinking. You stop noticing the aligners when you look in the mirror. Patients often tell me at their next appointment that week two felt dramatically easier than week one, and that by the time they switched to their second set of trays, the adjustment was minimal.

The first two weeks are the hardest part of Invisalign treatment. Everything after that is repetition with minor discomfort each time you switch to a new tray. If you can get through those fourteen days with patience and a sense of humor, the rest of the journey is genuinely manageable. I promise it gets easier, and I have thousands of patients who would back me up on that.

Read more…

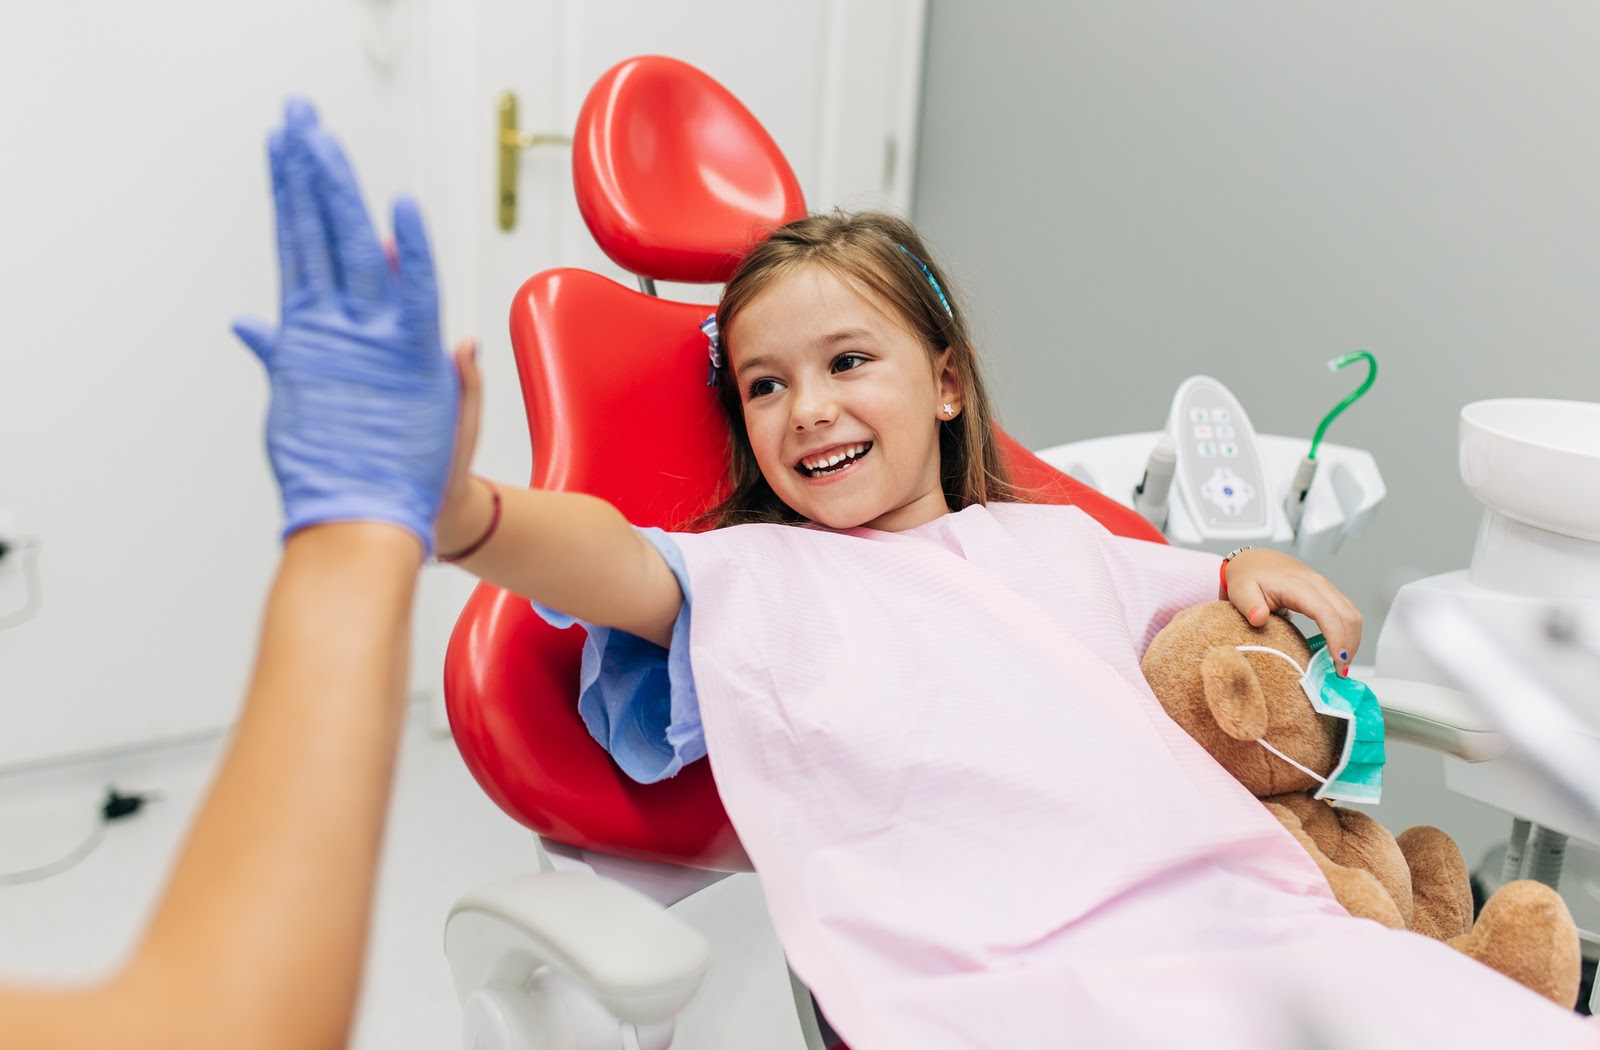
Fear of the dentist is one of the most common problems parents face. A child often associates a dental visit with insecurity, pain, and a loss of control. It's important to understand that timely dental care directly impacts a child's health and overall well-being. If this fear isn't addressed, it can become entrenched and persist into adulthood. In this article, we'll discuss six common reasons for children's dental anxiety and show parents how to manage it.

1. Fear of the unknown

One of the main reasons for children's fear is a lack of understanding of what will happen. Young children are particularly sensitive to new situations, and the dental practice, with its equipment and noises, can be frightening.

To help your child, it's important to explain the treatment process beforehand. Use simple and understandable language and avoid complicated medical terminology. You can also play "dentist" at home and use toys to demonstrate how the dentist examines teeth. Reading children's books or watching cartoons on the subject is also helpful. When a child knows what to expect, their anxiety can decrease significantly.

2. Negative past experiences

If a child has experienced pain or discomfort during a previous visit, they may associate the dentist with unpleasant sensations. Even a single bad experience can trigger persistent anxiety. In such a situation, it's important to take the child's feelings seriously rather than downplaying them. Avoid statements like "It doesn't hurt" or "You're just exaggerating." Instead, discuss what exactly frightened the child and explain that it might be different next time. Choose a compassionate and patient dentist who has experience with children and creates a calm atmosphere.

3. Fear of pain

Even if a child has never had dental treatment before, they may be afraid of pain, especially if they have heard about it from other children or adults. Sometimes parents reinforce this fear by saying, "Don't be afraid, it won't hurt at all." Such words actually make the child think about the possibility of pain.

It's best to speak honestly but sensitively: "It can be a little uncomfortable at times, but the dentist will do everything to make you feel at ease." Modern dentistry offers various pain relief options, and it's important to reassure your child that they will be treated carefully. It's also helpful to discuss with the pediatric dentist beforehand how they explain treatments to children.

4. Feeling of loss of control

During treatment, a child has to sit still, open their mouth, and follow the dentist's instructions. This can trigger anxiety, especially in children who are used to being in control. To reduce stress, make your child feel included. For example, agree on a signal they can give if they feel uncomfortable (for example, raising their hand). Explain that they can take a break at any time. When a child realizes their opinion matters, they feel more secure.

5. Influence of others

Children often adopt the fears of their parents, older siblings, or friends. If someone tells horror stories about dental treatments, a child quickly expects the worst. Parents should therefore be mindful of their choice of words. Avoid sharing your own negative experiences in front of your child. Instead, foster a positive attitude. Explain to your child that the dentist helps keep teeth healthy and beautiful. If possible, accompany your child to checkups and remain calm and composed.

6. Unpleasant environment

Loud noises, bright lights, and strong smells can intensify a child's anxiety. Even adults sometimes feel uncomfortable in a dental practice, and children even more so. Therefore, it is important to choose a practice that is geared towards young patients. A friendly atmosphere, toys, cartoons, and attentive staff contribute to a more relaxed environment. You can also bring your child's favorite toy to give them a sense of security.

The bottom line

Dental anxiety is a normal reaction, especially in childhood. With the right approach, however, it can be significantly reduced or even completely overcome. It's important to support your child, respect their feelings, and gradually create a positive experience at the dentist.

Read more…

That Moment the Brackets Come Off

Braces-bracket-loose-blog-header-e1654188521972-1200x720.jpg

I remember my first patient who asked me about whitening before she even sat down for her debonding appointment. She had been counting down the days until her braces came off, and somewhere along the way she had decided that the very same afternoon would be the day she started whitening. I had to slow her down a bit, and I find myself having that same conversation with patients regularly. The excitement is completely understandable. You have spent months or years investing in a straighter smile, and you want it to look its absolute best. But timing matters more than most people realize when it comes to whitening after orthodontic treatment.

When your braces finally come off, your teeth may look a little uneven in color. Some patients notice lighter spots where the brackets were bonded and slightly darker or more yellow areas around the edges. This is normal. The adhesive that held your brackets in place shielded small patches of enamel from the foods, drinks, and general staining that affected the rest of the tooth surface over the course of treatment. The good news is that this unevenness typically resolves on its own within a few weeks as your teeth re-equilibrate with saliva and normal exposure.

How Long You Should Wait to Whiten

So can you whiten teeth right after braces come off? Technically you can, but I strongly recommend waiting. The general guideline I give my patients is to wait at least two to four weeks after debonding before starting any whitening treatment. Some colleagues recommend waiting as long as six weeks, and honestly, I think erring on the longer side is wise for most people.

Here is why the waiting period matters. When brackets are removed, the enamel surface has just been cleaned of adhesive residue. Your gums may be slightly inflamed from the braces themselves, especially if oral hygiene was challenging during treatment. The tooth surface needs time to remineralize and stabilize. Applying a bleaching agent to freshly exposed, slightly dehydrated enamel can lead to increased sensitivity and uneven whitening results. I have seen patients who jumped in too early end up with splotchy results that took additional treatments to correct.

How long should you wait to whiten teeth after braces? For most patients, I recommend a minimum of two weeks and ideally four to six weeks. During that waiting period, focus on excellent oral hygiene, use a remineralizing toothpaste, and let your enamel recover. Your teeth will actually look better on their own during this time as the color differences from bracket placement begin to even out naturally.

Professional Whitening Options

Once you have waited the appropriate amount of time, you have several options to consider. In-office professional whitening is one of the most popular choices for post-braces patients. These treatments use higher concentration bleaching agents under controlled conditions, and results are visible in a single appointment. I often recommend this route for patients who want dramatic, fast results and who have the budget for it.

Custom tray whitening is another professional option that I frequently suggest. Your orthodontist or dentist can fabricate clear trays that fit your newly straightened teeth precisely. You then use a professional-grade whitening gel at home, typically for thirty minutes to an hour each day over the course of one to two weeks. This approach gives you more control over the process and tends to produce very even results because the trays ensure consistent contact between the gel and your tooth surfaces.

I personally lean toward the custom tray approach for many post-braces patients because it allows for a more gradual whitening process. If sensitivity becomes an issue, you can simply skip a day or reduce the wear time. With in-office treatments, you are committing to the full session in one sitting.

Over-the-Counter Products and What to Watch For

Plenty of patients ask about drugstore whitening strips and similar products. These can work, and they are certainly more affordable than professional options. The active ingredient is usually the same, just at a lower concentration. Whitening strips can be a reasonable choice for patients with mild staining who want a subtle improvement.

However, there are some things to be cautious about. Generic strips and trays are not custom fitted to your teeth, so the whitening gel may not contact all surfaces evenly. This can lead to streaky results, particularly on teeth with any remaining irregularities in alignment. Also, some over-the-counter products contain abrasive ingredients that I would prefer my patients avoid in the weeks immediately following braces removal, when enamel is still recovering.

Whitening toothpastes are the mildest option and are generally safe to use even during the waiting period. They will not produce dramatic results, but they can help maintain brightness and remove surface stains from coffee, tea, or red wine. Just look for one that carries a dental association seal of approval and avoid anything that feels overly gritty.

What to Avoid Entirely

There are a few things I tell every post-braces patient to steer clear of. First, avoid any whitening treatment that involves UV or LED light activation if you are within the first month of having your braces removed. The combination of light and bleaching agents on recently treated enamel can significantly increase sensitivity. Second, do not use charcoal-based whitening products. These are abrasive and can damage enamel that is still in recovery mode. Third, skip any homemade whitening remedies involving lemon juice, baking soda pastes, or hydrogen peroxide rinses mixed at home. The concentrations are unpredictable and the acidity can erode enamel.

I also advise against whitening if you have any active gum inflammation or if your orthodontist noted areas of decalcification, those white spot lesions that sometimes appear around bracket sites. These areas need to remineralize first, and whitening them prematurely can make the spots more noticeable rather than less.

Getting the Best Results

The patients who end up happiest with their post-braces whitening are the ones who approach it patiently and methodically. Wait the recommended time. Choose a method that suits your sensitivity level and budget. Follow the instructions carefully and do not exceed recommended treatment times, thinking that more is better. It is not. Overbleaching leads to translucent, chalky-looking enamel and significant discomfort.

If you had braces as a teenager and are now whitening as an adult, or if significant time has passed since debonding, the waiting period guidelines are less critical. Those apply primarily to the immediate post-treatment window. For anyone whitening months or years after braces, you can generally proceed as any other patient would.

Your orthodontist and general dentist are your best resources for personalized advice. Every patient is different, and factors like enamel thickness, existing sensitivity, and the presence of restorations all influence which approach will give you the safest, most beautiful result. The straight smile you worked so hard for deserves the right finishing touch, and a little patience at the end will pay off with a whiter, healthier result that lasts.

Read more…

Sensodyne-Sensitive-Teeth_after-whitening.jpg?auto=format

You just whitened your teeth and they look great. But now you are wincing every time you drink cold water or breathe in through your mouth on a chilly day. That sharp, zingy sensation is one of the most common side effects of teeth whitening, and while it is not dangerous, it can be genuinely unpleasant. I want to explain exactly why it happens, how long you can expect it to last, and what you can do to minimize the discomfort.

I see this in my practice regularly. Patients are thrilled with their whitening results but caught off guard by the sensitivity that follows. Understanding the mechanism behind it helps take away some of the worry.

What Causes the Sensitivity

Why do teeth hurt after whitening? The peroxide used in whitening products does not just sit on the surface of your enamel. It penetrates through the enamel layer and into the dentin underneath, which is the layer that contains microscopic tubes leading toward the nerve of the tooth. When peroxide reaches those tubules, it causes temporary inflammation and fluid movement within them. Your nerve interprets this as sensitivity or pain, particularly in response to temperature changes, cold air, or sweet foods.

This process is called transient pulpal inflammation, and despite how it sounds, it is not harmful to your teeth. The inflammation is temporary and resolves on its own as the tooth rehydrates and the peroxide byproducts dissipate. Think of it like how your skin might feel irritated after a strong exfoliating treatment; the underlying tissue is fine, but it needs a brief recovery period.

Higher concentrations of peroxide cause more sensitivity for most people. This is why in-office whitening, which uses the strongest formulations, tends to produce more noticeable sensitivity than over-the-counter strips with lower concentrations. Duration of exposure matters as well. Leaving whitening gel on longer than recommended increases the likelihood and intensity of sensitivity.

How Long It Typically Lasts

How long does sensitivity last after teeth whitening? For the vast majority of patients, sensitivity peaks within the first twenty-four to forty-eight hours after treatment and resolves completely within one to three days. Some patients experience it for up to a week, but this is less common and usually associated with higher-concentration treatments or pre-existing sensitivity issues.

I tell patients to plan for two to three days of noticeable sensitivity after professional whitening. For over-the-counter strips used over multiple days, sensitivity may come and go throughout the treatment period but should resolve within a few days of completing the course.

If sensitivity persists beyond ten days, or if it is severe enough that you cannot eat or drink normally, contact your dentist. Prolonged sensitivity after whitening can occasionally indicate an underlying issue that was not apparent before treatment, such as a small crack or early cavity that the peroxide penetrated.

Strategies That Actually Help

There are several evidence-based approaches to managing post-whitening sensitivity, and they range from products you probably already own to techniques you can apply during and after treatment.

Desensitizing toothpaste containing potassium nitrate is your best friend during this period. Potassium nitrate works by calming the nerve endings inside dentin tubules, reducing their ability to transmit pain signals. For best results, start using desensitizing toothpaste one to two weeks before your whitening treatment. This pre-treatment builds up protection in advance and significantly reduces the severity of post-whitening sensitivity.

You can also apply desensitizing toothpaste directly to sensitive teeth and leave it on for a few minutes before rinsing. Some patients apply a thin layer before bed and let it work overnight. This concentrated contact provides extra relief during the peak sensitivity window.

Avoid very hot and very cold foods and beverages for the first forty-eight hours after whitening. Room temperature water, lukewarm coffee, and avoiding ice cream for a couple of days makes a meaningful difference. The sensitivity is primarily triggered by temperature extremes, so moderating what you expose your teeth to during the recovery period reduces discomfort significantly.

Avoid acidic foods and drinks for the first day or two as well. Citrus, tomato sauce, soda, wine, and vinegar-based dressings can exacerbate sensitivity in freshly whitened teeth because the enamel is temporarily more porous after peroxide exposure.

What Your Dentist Can Do

If you are whitening professionally, your dentist has additional tools to manage sensitivity. Many offices apply a fluoride varnish or desensitizing gel immediately after in-office whitening treatment. These products seal the dentin tubules and provide a protective layer that reduces sensitivity onset.

For patients with custom take-home trays, your dentist may recommend alternating whitening sessions with desensitizing gel sessions. One night you wear the whitening gel, the next night you wear a desensitizing product in the same trays. This approach slows the whitening timeline slightly but makes the process far more comfortable.

If you have a history of sensitive teeth in general, not just from whitening, discuss this with your dentist before treatment. They may recommend a lower-concentration product, shorter application times, or a more gradual approach that produces results with less discomfort. There is almost always a way to whiten successfully while managing sensitivity; it just requires adjusting the protocol to your individual tolerance.

Preventing Sensitivity in Future Whitening Sessions

If you plan to maintain your whitening results over time with periodic touch-ups, knowing your sensitivity pattern helps you prepare. The two-week desensitizing toothpaste pre-treatment I mentioned is the single most effective preventive strategy. Building it into your routine before each whitening session dramatically reduces what you experience afterward.

Spacing touch-up treatments appropriately also matters. Whitening too frequently does not produce proportionally better results, but it does increase sensitivity risk. Most patients maintain excellent results with professional touch-ups every six to twelve months or brief strip applications every few months. More frequent than that is unnecessary and increases your chances of discomfort.

Maintaining good enamel health between whitening sessions supports comfort as well. Using fluoride toothpaste daily, avoiding excessive acidic food and beverage consumption, and addressing any cavities or areas of enamel erosion promptly all contribute to teeth that respond to whitening with minimal sensitivity.

The bottom line is this: sensitivity after whitening is normal, temporary, and manageable. It does not mean something went wrong. It simply means the whitening products did their job penetrating your enamel to break apart stains, and your teeth need a brief period to settle back to their baseline. With the right preparation and a few days of gentle care, the discomfort passes and you are left with a brighter, healthier-looking smile.

Read more…

WhatsApp-Image-2025-02-10-at-09.46.25_b601c61e.jpg

Teeth whitening is one of those topics where marketing has thoroughly outpaced education. You see advertisements promising dramatic transformations from products that cost fifteen dollars at the drugstore, and you wonder whether professional teeth whitening, at a significantly higher price point, is really worth it. It is a fair question, and it deserves an honest answer rather than a sales pitch.

I want to break down what actually differs between professional whitening and store-bought strips, explain when each option makes sense, and help you make a decision based on your specific situation rather than advertising claims.

How Whitening Works at a Basic Level

All teeth whitening uses some form of peroxide to bleach stains from tooth enamel. Hydrogen peroxide and carbamide peroxide are the two most common active ingredients, and they work by penetrating the enamel surface and breaking apart the molecular bonds of stain compounds through oxidation. The concentration of peroxide, the duration of contact, and the method of delivery are what differentiate one whitening approach from another.

This is important to understand because it means all whitening products operate on the same fundamental principle. The question is not whether the chemistry works. It does. The question is how effectively and safely a given product delivers that chemistry to your teeth.

What Professional Whitening Offers

Is professional teeth whitening worth it? For many patients, yes. Here is why. In-office whitening uses peroxide concentrations significantly higher than anything available over the counter, typically ranging from twenty-five to forty percent hydrogen peroxide compared to the three to ten percent found in retail products. This higher concentration produces faster, more dramatic results, often in a single appointment lasting sixty to ninety minutes.

Beyond concentration, professional whitening involves customized application. Your dentist or hygienist isolates the gum tissue with a protective barrier before applying the whitening gel, which prevents the high-concentration peroxide from irritating soft tissue. The gel is applied evenly across all visible surfaces, ensuring consistent color change without the patchiness that can occur with strips that do not conform perfectly to tooth contours.

Custom take-home trays from your dentist represent a middle ground. These are fabricated from impressions of your teeth, so they fit precisely and hold whitening gel in uniform contact with every surface. The peroxide concentration is lower than in-office treatment but higher than retail strips, typically ten to twenty percent carbamide peroxide. Treatment involves wearing the trays for a prescribed period over one to two weeks.

The other major advantage of professional whitening is supervision. Your dentist evaluates your teeth before treatment to identify any issues that should be addressed first, such as cavities, cracked teeth, or gum recession that might cause problems during whitening. They can also predict how your teeth will respond based on the type and source of your staining.

What Store-Bought Strips Do Well

Over-the-counter whitening strips are not scams. They contain real peroxide and they do lighten teeth for most users. The concentrations are lower and the contact time is longer (daily use over two to three weeks), but they produce noticeable improvement for many people, particularly those with mild to moderate surface staining from coffee, tea, or wine.

The major advantages of strips are cost and convenience. A box of whitening strips costs a fraction of professional treatment, requires no dental appointment, and can be used on your own schedule at home. For someone with generally healthy teeth, mild staining, and a limited budget, strips represent a reasonable starting point.

Modern strips have improved significantly from early versions. Many now use a hydrogen peroxide concentration around ten percent, and the adhesive technology conforms better to tooth surfaces than it did a decade ago. Results are not as dramatic as professional treatment, but they are real.

The Key Differences That Matter

What is the difference between professional and store-bought whitening? It comes down to several factors that may or may not matter depending on your situation.

Speed and degree of change is the most obvious difference. Professional treatment achieves in one or two sessions what strips take weeks to approximate, and the final result is typically several shades lighter with professional care. If you need significant whitening for an upcoming event or want maximum brightness, professional treatment delivers more reliably.

Uniformity of results is another important distinction. Custom trays and professionally applied gel reach every surface of every tooth evenly. Strips can leave the spaces between teeth, the gum line margins, and the edges of teeth less thoroughly whitened, creating subtle unevenness that bothers some people.

Safety and screening matter as well. If you have untreated cavities, worn enamel, exposed root surfaces, or certain types of dental restorations, whitening without professional guidance can cause problems ranging from intense sensitivity to actual damage. A dental exam before whitening catches these issues. Using strips without that screening means accepting the risk of whitening teeth that are not ready for it.

Longevity of results tends to favor professional treatment as well. The deeper penetration of higher-concentration products often produces results that last longer before requiring touch-up treatments, though individual habits like coffee consumption and smoking status affect duration regardless of the method used.

When Strips Make Sense

If your teeth are healthy, your staining is mild, you have had a recent dental checkup with no noted concerns, and you want modest improvement on a budget, over-the-counter strips are a reasonable choice. They are also appropriate for maintenance between professional treatments, extending the life of a professional whitening result.

I recommend that patients using strips still follow the product directions precisely. More is not better with peroxide products. Overuse or leaving strips on longer than directed increases sensitivity risk without proportionally improving results.

When Professional Treatment Is the Better Call

If your staining is moderate to severe, if you want dramatic results quickly, if you have dental concerns that need evaluation first, or if you have tried strips and found them ineffective, professional whitening is likely the better investment. It is also the better choice for people with dental restorations on visible teeth, since your dentist can advise you on how whitening will interact with crowns, veneers, or bonding.

Ultimately, both options work. The right choice depends on your specific teeth, your expectations, your timeline, and your budget. A conversation with your dentist can help you navigate those variables honestly, without pressure. The goal is a smile you feel good about, achieved safely, regardless of which path gets you there.

Read more…

How+to+Help+Your+Kids+Brush+Better+with+Braces-640w.jpg

Once the braces are on, the real work begins. Not in the orthodontist's chair, but at home, every single day. As a parent, you play a critical role in making sure your child's treatment stays on track. But here is what I have learned after years of working with families: the parents who succeed are the ones who coach rather than police. There is a meaningful difference between nagging your kid about brushing and equipping them with tools and routines that make good habits natural.

This guide is the practical playbook I wish I could hand every parent on the day their child gets braces. It covers the daily essentials, common problems, and strategies that actually work for real families with busy schedules.

The Daily Brushing Routine

How do kids brush their teeth with braces? The technique matters more than most families realize. Brackets create dozens of tiny ledges where food particles and plaque accumulate, and a quick once-over with a toothbrush leaves most of that buildup in place. The key is angle and attention.

Teach your child to brush at a forty-five degree angle, directing bristles both above and below each bracket. The area between the bracket and the gumline is where most problems develop, so spending extra time there is essential. Then angle downward to clean below each bracket toward the biting edge of the tooth. Each tooth needs individual attention on both the front and back surfaces.

A soft-bristled toothbrush works best. Electric toothbrushes with small round heads are excellent for kids with braces because the rotating motion cleans around brackets more effectively than manual brushing for most children. If your child uses a manual brush, make sure they are spending at least three minutes per session, which is longer than the two minutes typically recommended for patients without braces.

Brushing should happen after every meal, not just morning and night. I know that sounds demanding, especially for school days. A travel toothbrush in their backpack makes lunchtime brushing possible. Even a quick rinse with water after eating is better than nothing when a full brushing session is not feasible.

Flossing With Braces

Flossing is harder with braces, which is exactly why it matters more. The wire connecting brackets prevents regular floss from sliding between teeth the normal way. Your child will need either a floss threader, which feeds floss underneath the wire, or an orthodontic flosser designed specifically for braces. Water flossers are another excellent option that many kids find easier and faster than traditional floss.

I recommend flossing once a day, ideally before bed. It does not need to happen after every meal the way brushing should. But that once-daily session is non-negotiable for preventing cavities between teeth and keeping gums healthy throughout treatment.

For younger children or those with limited dexterity, a water flosser can be a game-changer. The pulsing stream of water dislodges food and reduces plaque in areas that are nearly impossible to reach with string floss alone. It is not a complete replacement for traditional flossing, but it is far better than no interproximal cleaning at all.

When Something Breaks

What happens if my child breaks a bracket? First, do not panic. Broken brackets are one of the most common occurrences in orthodontic treatment, and they are almost never an emergency. The bracket may slide along the wire or hang loose, and while it can be annoying, it is not usually painful or dangerous.

Call your orthodontist's office during business hours to schedule a repair. If the broken bracket is causing irritation, orthodontic wax pressed over it will provide immediate relief. If a wire is poking out and causing discomfort, you can use a clean pencil eraser to gently push the wire flat against the teeth, or cover the end with wax until your repair appointment.

The situations that do require prompt attention include a wire that has come completely out of the last bracket and is poking into the cheek or gum, swelling or signs of infection around a bracket site, or significant pain that does not respond to over-the-counter medication. These are uncommon, but knowing the difference between a minor annoyance and something that needs same-day attention gives parents peace of mind.

I tell families that one or two broken brackets over the course of treatment is normal. More than that, and we should talk about whether certain food habits or activities are contributing to the problem.

Making Habits Stick

The biggest challenge for most families is not knowing what to do. It is doing it consistently for months or years. Here are strategies that I have seen work in real households.

Routine anchoring is powerful. Attach brushing to something your child already does without thinking. If they always shower before bed, brushing happens immediately after the shower. If they eat breakfast at the same time each morning, brushing follows within five minutes. Connecting new habits to established ones dramatically improves consistency.

Visible supplies matter more than you might think. A dedicated caddy on the bathroom counter with their orthodontic toothbrush, floss threaders, wax, and mouthwash serves as a visual cue. When everything is out and organized rather than buried in a drawer, the barrier to compliance drops significantly.

For younger children, a simple chart or sticker system can provide motivation during the first few months until the habit becomes automatic. For teenagers, I find that showing them photos of what happens when braces hygiene is neglected, white spots and decalcification marks, tends to be more motivating than any reward system. Teens care about how their teeth will look after braces come off, and that vanity can be channeled productively.

Diet Reminders Without the Power Struggle

Food rules with braces are a common source of parent-child conflict. My advice is to set clear expectations once, stock your home with braces-friendly options, and avoid turning every snack choice into a confrontation.

Keep cut fruit, soft granola bars, yogurt, string cheese, and other easy options visible and accessible. If the convenient choices in your kitchen are all braces-safe, your child will naturally reach for them most of the time. You cannot control what they eat at a friend's house or at school, but you can control what is available at home.

When they do eat something questionable and nothing breaks, resist the urge to lecture. A calm reminder is fine. A repeated lecture creates resentment and makes your child less likely to tell you when something does go wrong. Trust me on this one. I have seen the pattern many times.

Keeping Appointments on Track

Regular adjustment appointments, typically every four to eight weeks, are essential for treatment progress. Missing or repeatedly rescheduling appointments extends treatment time, sometimes significantly. Build these appointments into your family calendar as non-negotiable commitments, similar to how you would treat a recurring medical appointment.

Many orthodontists offer after-school or early morning slots specifically for student patients. If scheduling is a challenge, ask about available times that minimize school absences. Some offices also provide reminder systems via text or email that help busy families stay organized.

Your child's orthodontist is your partner in this process. If something is not working, whether that is compliance with rubber bands, frustration with hygiene, or concerns about treatment progress, bring it up at appointments. We would rather hear about problems early than discover them months later when they have become harder to fix. Open communication between parents, patients, and the orthodontic team is what produces the best outcomes.

Read more…

Tooth loss is more than just a cosmetic concern. It affects how people eat, speak, and feel about themselves in everyday life. Patients searching for long term tooth replacement solutions often want something that looks natural, feels comfortable, and lasts for years without constant maintenance. Dental implants have become one of the most trusted and advanced options in modern dentistry for addressing missing teeth.

A skilled dentist will often recommend dental implants because they provide a stable, natural looking, and durable solution compared to traditional alternatives. Understanding the benefits of dental implants can help patients make confident and informed decisions about their oral health.

What Are Dental Implants and How Do They Work

Dental implants are small titanium posts that are surgically placed into the jawbone to act as artificial tooth roots. Over time, the implant fuses with the bone through a natural process called osseointegration. Once healed, a custom crown, bridge, or denture is attached to the implant, restoring both function and appearance.

This structure mimics a natural tooth from root to crown, which is why implants are widely considered the gold standard in restorative dentistry.

Top 10 Benefits of Dental Implants

1. Natural Look and Feel

Dental implants are designed to look, feel, and function like real teeth. The custom crowns are carefully matched to the color, shape, and size of surrounding teeth, allowing them to blend seamlessly into the smile. Most patients forget they even have an implant after healing.

2. Long Lasting and Durable Solution

One of the biggest advantages of dental implants is their longevity. With proper care and regular dental visits, implants can last decades and often a lifetime. Unlike dentures or bridges that may need replacement every few years, implants are a stable long term investment.

3. Improved Chewing and Eating Ability

Missing teeth or ill fitting dentures can make it difficult to chew certain foods. Dental implants restore full biting strength, allowing patients to enjoy a wide range of foods without discomfort or worry. This improvement supports better nutrition and overall health.

4. Helps Preserve Jawbone Health

When a tooth is lost, the jawbone in that area begins to shrink over time due to lack of stimulation. Dental implants are the only tooth replacement option that actively stimulates the jawbone, helping to maintain its strength and structure. This prevents bone loss and supports long term oral health.

5. Prevents Facial Sagging and Aging Appearance

Bone loss caused by missing teeth can lead to a sunken or aged facial appearance. By preserving the jawbone, dental implants help maintain facial structure and volume. Patients often notice a more youthful and natural look after treatment.

6. No Impact on Surrounding Teeth

Unlike traditional dental bridges, implants do not require adjacent teeth to be shaved down or altered. This preserves the natural structure of surrounding teeth and reduces the risk of future dental complications.

7. Easy Maintenance and Oral Hygiene

Caring for dental implants is simple and similar to caring for natural teeth. Regular brushing, flossing, and routine dental checkups are usually sufficient to maintain their health. There is no need for special adhesives or removal routines as required with dentures.

8. Enhanced Speech and Confidence

Loose or poorly fitted dentures can slip and affect speech clarity. Dental implants remain securely in place, allowing patients to speak clearly and confidently without fear of movement or embarrassment.

9. High Success Rate and Safety

Dental implants have a very high success rate when performed by experienced professionals. Advances in dental technology and planning techniques have made implant procedures safer, more predictable, and more comfortable than ever before.

10. Improves Overall Quality of Life

From better eating habits to increased confidence in social situations, dental implants significantly enhance a patient’s daily life. Many individuals report feeling more comfortable, confident, and satisfied with their smile after treatment.

Expert Insight on Dental Implants

According to Dr. Sanjay Kumar, a skilled dentist in Manteca CA, dental implants have transformed the way modern dentistry approaches tooth replacement. He explains that patients benefit not only from the aesthetic improvement but also from the long term protection of their oral health. In his professional observation, patients who choose implants often experience greater comfort and confidence compared to traditional options, especially when treatment is customized to their specific needs.

Who Is a Good Candidate for Dental Implants

Most healthy adults with missing teeth are potential candidates for dental implants. Ideal candidates typically have sufficient jawbone density and healthy gums. However, even patients with bone loss may qualify with additional procedures such as bone grafting.

A consultation with an experienced dentist in Manteca CA helps determine whether implants are the right solution based on individual oral health, lifestyle, and goals.

What to Expect During the Dental Implant Process

The dental implant process usually involves multiple steps over several months. It begins with a comprehensive evaluation, including digital imaging and treatment planning. The implant is then placed into the jawbone during a minor surgical procedure. After a healing period, the final restoration is attached to complete the process.

Although the timeline may vary, the result is a strong and natural looking tooth replacement that functions just like a real tooth.

Why Patients Are Choosing Dental Implants Today

Modern patients are more informed and selective about their dental care options. They are looking for solutions that offer long term value, natural aesthetics, and minimal disruption to their lifestyle. Dental implants meet all these expectations, making them one of the most popular choices in restorative and cosmetic dentistry.

With advancements in technology, many procedures are now more efficient and comfortable, reducing downtime and improving overall patient experience.

Final Thoughts

Dental implants continue to set the standard for replacing missing teeth because they address both functional and aesthetic concerns at the highest level. They offer durability, stability, and a natural appearance that few other options can match.

For anyone considering tooth replacement, consulting with a knowledgeable dentist in Manteca CA is the first step toward restoring a healthy and confident smile. With the right care and expertise, dental implants can provide lasting benefits that go far beyond just replacing a missing tooth.

Read more…

Kids-Orthodontics.jpg

When I tell parents their child needs braces, I watch two reactions happen simultaneously. The parent starts thinking about logistics, cost, and scheduling. The child starts thinking about what this means for their daily life, their appearance, and whether it will hurt. Both sets of concerns are valid, and addressing them early makes the entire experience smoother for your family.

I have been placing braces on children and teenagers for many years, and I can tell you that the kids who transition most easily are the ones whose parents took time to prepare them. Not with false promises that everything will be perfect, but with honest, age-appropriate information and a supportive attitude.

When Braces Typically Enter the Picture

What age do kids usually get braces? Most children begin comprehensive orthodontic treatment between ages eleven and fourteen. This is when the majority of permanent teeth have erupted and the jaw is still growing, which gives us the best opportunity to guide teeth into proper alignment. However, some children benefit from earlier intervention, sometimes called Phase One treatment, which can begin as early as age seven or eight to address specific issues like crossbites, severe crowding, or jaw discrepancies.

The American Association of Orthodontists recommends a first evaluation by age seven, not because most seven-year-olds need treatment, but because early detection of certain problems allows us to plan appropriately. If your child's dentist has suggested an orthodontic consultation, that does not automatically mean braces are imminent. Often it simply means we want to monitor growth and development.

Having the Conversation with Your Child

How you introduce the idea of braces matters more than you might think. I have seen children arrive at consultations either terrified or indifferent based entirely on how the topic was framed at home. The goal is to be matter-of-fact and positive without dismissing their feelings.

Start by explaining why braces might be needed in terms they can understand. For younger children, something like: your teeth need a little help lining up so they work well and stay healthy. For older kids and teens, you can be more direct about alignment, bite issues, and the long-term benefits of treatment.

Avoid promising that it will not hurt, because there will be some discomfort, and losing credibility early makes everything harder later. Instead, acknowledge that it might be uncomfortable at first and reassure them that the feeling passes quickly and that you will be there to help them through it.

Addressing Their Real Concerns

Children and teenagers worry about different things than adults do. For younger kids, the primary concern is usually pain. For teenagers, appearance and social perception often take the lead. Both deserve to be taken seriously.

If your child is worried about how they will look, let them know that braces are incredibly common. Depending on the school, a significant portion of their classmates may already have them or will get them soon. You might also discuss options like clear brackets or ceramic braces if your orthodontist offers them and they are appropriate for your child's case.

If pain is the worry, be honest that the first few days involve soreness, but frame it in context. Compare it to the feeling after a hard workout, not to anything sharp or scary. And remind them that it gets better quickly.

I once had a twelve-year-old patient whose mother told him braces would feel like nothing. When the soreness kicked in that evening, he was angry and felt lied to. It took weeks to rebuild trust around the process. Honesty, delivered kindly, is always the better approach.

Practical Steps Before the Appointment

How do I prepare my child for getting braces? Beyond the emotional preparation, there are practical things you can do in the days leading up to placement that will make the transition easier.

Stock your kitchen with soft foods before the appointment. Yogurt, pudding, applesauce, mashed potatoes, smoothie ingredients, soft pasta, scrambled eggs, and soup are all excellent options for the first few days. Having these ready eliminates the stress of figuring out meals when your child is uncomfortable and hungry.

Purchase orthodontic wax ahead of time. Your orthodontist will likely provide some, but having extra at home means you are never caught without it when a bracket starts rubbing. A small container of wax in a backpack or purse is also wise for the first few weeks.

Make sure you have over-the-counter pain relief appropriate for your child's age and any allergies. Ibuprofen or acetaminophen can take the edge off the initial soreness and help them sleep comfortably that first night.

Consider scheduling the appointment for a day when your child can rest afterward. A Friday or a day before a break works well. They probably will not need to miss school, but having low-pressure time to adjust without academic demands helps.

Building Confidence Around Oral Hygiene

One of the most impactful things you can do before braces go on is establish a strong oral hygiene routine. If your child is already comfortable brushing thoroughly twice a day and flossing regularly, the transition to cleaning around brackets will be much less overwhelming.

If hygiene habits are currently inconsistent, spend a few weeks before the appointment working on them together. Practice brushing for a full two minutes. Introduce flossing if it is not already part of the routine. Frame it as preparation, not punishment. You might say something like: braces require really clean teeth to work well, so let us practice getting into a good groove now.

Some families find it helpful to get a timer, an electric toothbrush, or a new set of supplies to mark the fresh start. Making oral care feel intentional rather than nagging can shift a child's attitude significantly.

Setting Expectations for the Longer Journey

Braces are not a one-day event. Treatment typically lasts eighteen months to two and a half years, and your child will need regular adjustment appointments throughout that time. Helping them understand the timeline prevents frustration later.

Frame the duration in terms they relate to. For a thirteen-year-old, you might say: you will probably have them off before high school graduation, or by the time you start driving. Giving them a mental endpoint makes the commitment feel manageable rather than endless.

Also prepare them for the reality that treatment involves some responsibility on their part. Wearing rubber bands as directed, avoiding certain foods, keeping their teeth clean, and attending appointments on schedule all affect how quickly treatment progresses. Giving them ownership of these tasks builds maturity and investment in their own outcome.

Your role as a parent throughout this process is support without micromanagement. Check in about how things feel. Remind them about hygiene without hovering. Celebrate milestones like the halfway point or a particularly good checkup. And when they have a tough day, remind them that this is temporary and the result will be worth it. The children who hear that consistently from their parents are the ones who navigate braces with the least stress.

Read more…

Getting braces is one of those experiences that sounds simple until you actually sit in the chair. I remember one of my younger patients telling me, with complete seriousness, that she expected her teeth to feel different within the first hour. She was not wrong. They did feel different. Just not in the way she imagined.

expectaion-during-first-month-braces.jpg

I want to walk you through what the first month with braces actually looks like, day by day and week by week. Not the sanitized version you read on a pamphlet, but the real experience that thousands of my patients have described over the years. If you know what is coming, you can prepare for it, and that makes everything easier.

The Day You Get Them On

The appointment itself is straightforward and painless. Placing brackets and threading the wire typically takes about an hour, sometimes a bit longer for complex cases. You will feel pressure as we attach things, but there is no sharp pain during the bonding process. Most patients are surprised by how uneventful the actual placement is.

When you leave the office, your teeth will feel bulky. Your lips and cheeks are suddenly sharing space with metal or ceramic brackets, and your tongue will not stop exploring them. This is completely normal. Your brain is hyper-aware of anything new in your mouth, and it takes time to stop noticing.

What the First Week Feels Like

So what does the first week of braces feel like? Honestly, it is the hardest part of the entire treatment for most people. The soreness typically begins about four to six hours after placement. Your teeth are not used to sustained pressure, and the ligaments around them become inflamed as they start responding to the force of the wire. This is the mechanism that actually moves teeth, so the discomfort is a sign that things are working.

Days two through four tend to be the peak of soreness. Biting down on anything firm can feel tender, almost like your teeth are bruised. Soft foods become your best friend during this stretch. I tell patients to stock up on yogurt, mashed potatoes, smoothies, scrambled eggs, and pasta before their appointment. Planning ahead saves a lot of frustration when you get home and realize chewing feels uncomfortable.

By days five through seven, most patients notice a significant improvement. The sharp tenderness fades into a dull awareness. You can eat more normally, though very crunchy or hard foods may still feel unpleasant. Your cheeks and lips may develop small sore spots where they rub against the brackets. Orthodontic wax is invaluable here; a small piece pressed over the irritating bracket creates a smooth barrier that lets the tissue heal.

Week Two: Finding Your Rhythm

The second week is when most patients start adapting. Your mouth begins to toughen up in the areas that contact the brackets. The soreness from tooth movement has largely subsided, and eating becomes much more comfortable. This is also when many people start getting used to their new oral hygiene routine.

Brushing and flossing with braces takes longer than it did before. I encourage patients to budget an extra three to five minutes per session. A soft-bristled toothbrush angled at forty-five degrees works well to clean around brackets, and floss threaders or orthodontic flossers make it possible to get between teeth despite the wire. It feels tedious at first, but like anything, it becomes automatic with repetition.

I had a patient once who timed himself during week two. He was spending almost ten minutes per brushing session because he was being so careful. By the end of the month, he had it down to four minutes and his hygiene was excellent. Practice genuinely makes a difference.

Weeks Three and Four: The New Normal

How long does it take to adjust to braces? For most patients, the answer is about three to four weeks. By this point, your cheeks and lips have adapted to the brackets. Your tongue has stopped obsessively touching everything. Eating is close to normal, with reasonable adjustments for hard or sticky foods. And you have likely settled into a brushing and flossing routine that works for you.

Some patients still experience mild soreness toward the end of the month, particularly if they have an adjustment appointment scheduled. Each time we change the wire or add new components, there can be a brief return of that initial tenderness. But it is almost always less intense than what you felt during the first week, and it resolves faster because your body has already adapted to the concept of tooth movement.

Speech is another area that normalizes during this period. Some patients notice a slight lisp or change in how certain sounds feel during the first week or two, especially with lingual braces or appliances near the roof of the mouth. By week three or four, your tongue has figured out how to work around everything and your speech sounds completely natural again.

Tips That Make the First Month Easier

Over the years, I have collected a mental list of things that genuinely help during this adjustment period. Cold foods and drinks can soothe sore teeth; ice water and frozen yogurt are popular choices. Over-the-counter pain relievers like ibuprofen or acetaminophen work well for the first few days if soreness is bothersome. Orthodontic wax should stay in your pocket, your backpack, your car, and your bathroom. You never know when a bracket will start irritating a spot.

Rinsing with warm salt water can help heal any sore spots on your cheeks or gums. A teaspoon of salt in a cup of warm water, swished gently for thirty seconds, reduces inflammation and promotes healing. This old remedy works remarkably well.

I also recommend patience with yourself. There will be a moment during that first week when you wonder why you agreed to this. Every patient has that moment. But I can tell you from watching thousands of people go through this process that the discomfort is temporary and the results are lasting. By the time your first month is behind you, braces feel like a normal part of your daily life.

When to Call Your Orthodontist

Most of what you experience during the first month falls within the range of expected discomfort. However, there are situations where you should reach out. If a wire is poking into your cheek and wax is not providing relief, we can clip or adjust it quickly. If a bracket comes loose, it is not an emergency, but you should call to schedule a repair. If you experience significant swelling, bleeding that does not stop, or pain that is not responding to over-the-counter medication after several days, those warrant a phone call.

The first month is a transition period, not a permanent state. Your body is remarkably good at adapting, and by day thirty, the vast majority of patients feel comfortable, confident in their routine, and already starting to notice subtle shifts in their smile. The hardest part is behind you faster than you expect.

Read more…

Spearteam-6-ways-improve-case-acceptance-01.jpg

There is a moment in every dentist's career when you realize that clinical excellence alone does not fill your schedule. I remember presenting a comprehensive treatment plan to a patient, knowing it was exactly what she needed, watching her nod along through every explanation, and then hearing her say she would think about it. She never came back. That experience sent me on a years-long journey to understand why patients decline dental treatment and what we can do differently in those critical conversations.

Why Patients Say No (And What They Really Mean)

When patients decline dental treatment, it is rarely because they disagree with your diagnosis. Most patients trust their dentist's clinical judgment. The real barriers are almost always emotional or logistical. Fear of pain, anxiety about cost, uncertainty about timing, overwhelm from too much information at once, or simply not understanding why a problem that does not hurt yet needs attention now.

I used to take treatment declines personally, as if they were a rejection of my clinical skills. Once I reframed them as communication gaps rather than failures, everything changed. The patient who says let me think about it is usually saying I do not feel confident enough to say yes yet. That is a solvable problem if you understand what confidence actually requires.

The Conversation Before the Conversation

How dentists increase case acceptance starts long before the treatment presentation itself. It starts with how patients experience your practice from the moment they walk in. Are they greeted warmly? Does the hygienist build rapport or just go through the motions? Is the environment calming or clinical and cold?

By the time I sit down to discuss treatment, I want the patient to already feel heard, comfortable, and trusting. My hygienists know that their relationship-building is not separate from case acceptance. It is foundational to it. A patient who feels rushed through their cleaning is not in an emotional state to accept a significant treatment plan twenty minutes later.

I also pay attention to what happens in the operatory before I enter. My assistants are trained to have genuine conversations, to notice what patients are anxious about, and to relay that information to me discreetly. When I walk in already aware that a patient is nervous about needles or stressed about finances, I can adjust my approach before the conversation even begins.

Showing Rather Than Telling

One of the most significant improvements in my case acceptance came from investing in visual communication tools. Intraoral cameras, digital imaging, and even simple before-and-after comparisons from similar cases transformed how patients understood their own dental health.

When a patient can see the crack in their own tooth on a screen, the conversation shifts entirely. You are no longer the authority figure delivering a verdict. You are a partner helping them see what you see. The treatment recommendation flows naturally from that shared understanding rather than feeling like a prescription handed down from on high.

I also stopped using clinical terminology in treatment presentations unless I immediately followed it with plain language. Saying you have a periapical abscess means nothing to most patients. Saying there is an infection at the tip of your root that will get worse without treatment is immediately understood and motivating.

Breaking Down Financial Barriers

Money is the elephant in every treatment conversation. Ignoring it does not make it go away. I learned to address finances early and matter-of-factly rather than waiting for the patient to bring it up or, worse, hoping they would not ask.

In my practice, we present financial information as part of the treatment conversation, not as a separate awkward discussion at the front desk afterward. I discuss the investment, the insurance coverage if applicable, and the payment options available. I frame it as here is how we make this work for you rather than here is what it costs.

I have also found that presenting treatment in phases when appropriate dramatically improves acceptance. A patient who cannot commit to eight thousand dollars of dentistry in one visit might readily accept the first three thousand dollar phase, especially when you explain the clinical priority and the timeline clearly.

The Follow-Up That Makes the Difference

The conversation does not end when the patient leaves your office. For treatment plans that are not accepted same-day, follow-up is everything. But follow-up done poorly feels like a sales pitch, and patients will disengage.

Our approach is to follow up with genuine care rather than urgency. A message a few days later asking if they have any questions or concerns they thought of after leaving. A note explaining that you understand it is a significant decision and you are available whenever they are ready. This removes pressure while maintaining connection.

I track our unscheduled treatment and review it monthly. Some patients need weeks to decide. Some need months. The important thing is that they do not feel forgotten or pressured. When they are ready, your practice should be the first place they think of, not the place they are avoiding because they feel guilty about not scheduling sooner.

Creating a Culture of Yes

Case acceptance is not just a doctor skill. It is a team sport. Every person in your practice either contributes to patient confidence or undermines it. Your front desk staff, hygienists, assistants, and treatment coordinators all play a role.

I invest intraining my entire team on communication skills, not just clinical knowledge. They understand that their job is to help patients feel confident and supported, not just clean teeth or process insurance claims. When a patient hears consistent messaging from every team member, reinforcing the importance of their treatment and the support available to them, acceptance rates climb.

The practices with the highest case acceptance rates are not necessarily the best clinicians. They are the best communicators. They meet patients where they are emotionally. They remove barriers systematically. They follow up with empathy. And they build teams that reinforce confidence at every touchpoint. Start by recording yourself during one treatment presentation this week and listening back. What you discover might change how you practice from that day forward.

Read more…

 Best-Content-Marketing-Tools-for-Orthodontic-Practices-1.png

I remember sitting in my office about five years ago, staring at an orthodontic marketing budget that felt like it was being thrown into a black hole. We were running ads, sponsoring local events, and doing all the things you are supposed to do to attract new patients. But something was off. The patients who did come in often seemed confused about their treatment options, unsure about timelines, and hesitant to commit. It took me longer than I care to admit to realize that the missing piece was not more advertising. It was education.

The Gap Between What Patients Want and What We Offer

Here is something I have noticed over and over again: patients today do not walk into a consultation cold. They have already been searching online. They have read forums, watched videos, and formed opinions before they ever sit in your chair. The question is whether your practice is part of that research journey or invisible during it. When orthodontists attract new patients, the ones who come in already educated about their options tend to convert at dramatically higher rates. They are not shopping on price alone. They already trust you because your content answered their questions weeks or months before they picked up the phone.

Content marketing absolutely works for orthodontic practices, but not in the way most of us were taught to think about marketing. It is not about flashy campaigns or viral moments. It is about consistently showing up with helpful, clear information that makes prospective patients feel confident choosing you.

Why Most Practices Overlook This Opportunity

I think the reason patient education content remains so underused is that it does not feel like marketing. Writing a blog post about what to expect during your first month with braces does not give you the same dopamine hit as launching a new ad campaign. There is no immediate phone ring. No spike in website traffic the next day. The results compound over time, which makes it easy to abandon.

Another factor is that many orthodontists delegate their marketing entirely and never think about what their ideal patient actually wants to know. We are clinicians first. We spent years learning biomechanics and treatment planning, not copywriting. But that clinical expertise is exactly what makes your educational content valuable. Nobody else can explain the nuances of treatment the way you can.

What Effective Patient Education Actually Looks Like

Let me be specific about what I mean by patient education content. I am not talking about generic articles stuffed with keywords. I am talking about genuinely helpful resources that answer the exact questions your prospective patients are typing into search engines. Think about the last ten consultations you did. What did patients ask? Those questions are your content strategy.

For example, one of the highest-performing pages on our practice website is a straightforward explanation of the differences between early treatment and waiting until all permanent teeth are in. Parents search for this constantly. They get conflicting advice from their pediatric dentist, from friends, from the internet. When they find a clear, balanced explanation written by an actual orthodontist, it builds immediate trust.

The format matters less than the substance. Blog posts, short videos, infographics, FAQ pages. All of these work. What matters is that the content addresses a real concern and provides a real answer without being salesy or vague.

The Compounding Returns of Educational Content

Here is what changed my mind about content marketing: I started tracking how patients found us. Not just the last click before they called, but the full journey. What I discovered was that many of our best patients, the ones who accepted comprehensive treatment plans without hesitation, had consumed three or four pieces of our content over several weeks before reaching out. They came in pre-sold. The consultation was a formality.

That is the compounding effect. A blog post you write today will still be generating trust and attracting patients two years from now. Compare that to a paid ad that stops working the moment you stop paying. Over time, a library of educational content becomes one of your most valuable practice assets. It works around the clock, it costs nothing to maintain, and it positions you as the authority in your market.

Getting Started Without Overwhelming Yourself

I know what you are thinking. You barely have time to eat lunch between patients, let alone write articles. I get it. But you do not need to publish five posts a week. Start with one piece of content per month. Choose the question you answer most often in consultations and write a thorough response. Keep it conversational. Pretend you are explaining it to a friend at a dinner party.

You can also repurpose content efficiently. A single blog post can become a social media series, an email to your patient list, and a handout for your front desk. One idea, multiple formats, minimal extra effort.

The orthodontists I know who do this well did not start with a grand strategy. They started with one honest answer to one common question. Then they did it again. And again. Within a year, they had a content library that was quietly doing more for their practice growth than any single marketing campaign ever had.

Measuring What Matters

If you are going to invest time in educational content, you need to know whether it is working. The metrics that matter are not page views or social media likes. Look at consultation requests that reference your content. Track how many new patients mention finding you through a specific article or video. Pay attention to your case acceptance rate over time. If patients are coming in more informed, your acceptance rate should climb.

I also recommend looking at the questions patients ask during consultations. If you notice fewer basic questions and more nuanced ones, that is a sign your content is doing its job. Patients are arriving further along in their decision-making process, which means shorter consultations, higher acceptance rates, and less time spent on education during chair time.

The practices that will thrive in the next decade are not necessarily the ones with the biggest ad budgets. They are the ones that build genuine trust at scale through education. Patient education content is not glamorous, it is not fast, and it will never go viral. But it is quietly the most powerful growth tool most orthodontic practices are completely ignoring. Start small, stay consistent, and let the results speak for themselves.

Read more…

13538666691?profile=RESIZE_710x

One of the most common questions I hear from new parents is whether their child really needs to see a specialist or whether their family dentist can handle everything. It is a fair question, and the answer is not always black and white. Both pediatric dentists and general dentists can provide excellent care for children, but there are important differences between the two that are worth understanding as you make decisions about your child's oral health.

I have worked alongside both general dentists and pediatric dental specialists throughout my career, and I have enormous respect for both. The right choice depends on your child's specific needs, their temperament, and sometimes simply what is available in your area. Let me walk you through the differences so you can make an informed decision.

What Sets a Pediatric Dentist Apart

What is the difference between a pediatric dentist and a regular dentist? The primary distinction is training. A pediatric dentist is a general dentist who has completed an additional two to three years of specialized residency training focused exclusively on treating infants, children, adolescents, and patients with special healthcare needs. During this residency, they receive advanced education in child psychology, behavior management, growth and development, and the unique dental conditions that affect young patients.

This specialized training means pediatric dentists are equipped to handle situations that general dentists may encounter less frequently. They are experts in managing dental anxiety in children, treating early childhood cavities, addressing developmental concerns, and providing care for patients with medical complexities or disabilities. Their offices are typically designed with children in mind, featuring kid friendly decor, smaller equipment, and staff trained specifically in working with young patients.

A general dentist, by contrast, is trained to treat patients of all ages. Many general dentists are wonderful with children and see pediatric patients regularly as part of their family practice. Some have taken continuing education courses in pediatric dentistry to enhance their skills. The quality of care your child receives depends heavily on the individual provider's experience, comfort level, and dedication to staying current with pediatric dental guidelines.

When to Start Dental Visits

At what age should a child first see a dentist? The American Academy of Pediatric Dentistry recommends that children have their first dental visit by age one, or within six months of the eruption of their first tooth, whichever comes first. This recommendation surprises many parents who assume dental visits should not start until a child has a full set of baby teeth.

The first visit is less about cleaning teeth and more about establishing a dental home, assessing risk factors for cavities, providing guidance on oral hygiene and nutrition, and getting your child comfortable with the dental environment. These early visits are brief and gentle, but they set the stage for a lifetime of positive dental experiences.

I recall a family who brought their three year old in for a first visit. The child had already developed several cavities from prolonged bottle use at night, something that could have been caught and prevented with an earlier visit. An age one dental visit would have given the parents guidance on transitioning away from the bottle and establishing good brushing habits before problems developed.

Situations Where a Pediatric Specialist Shines

There are certain situations where a pediatric dentist's specialized training becomes particularly valuable. Children with severe dental anxiety or behavioral challenges often benefit from the behavior management techniques that pediatric dentists practice daily. These techniques go beyond simply being friendly. They include specific communication strategies, distraction methods, and when necessary, sedation options that pediatric dentists are trained to administer safely.

Children with special healthcare needs, including autism spectrum disorder, Down syndrome, cerebral palsy, and other conditions, often receive better care from pediatric dental specialists. These providers understand how various medical conditions affect oral health and how to modify their approach to accommodate each patient's unique needs.

Very young children who need extensive dental work also tend to do better with a pediatric dentist. Treating a two year old with multiple cavities requires a different skill set than treating an adult with similar issues. The behavioral management alone is a specialized competency that general dentists may not practice regularly.

When a General Dentist Is a Great Choice

For many families, a general dentist who is experienced and comfortable with children provides excellent care. If your child is healthy, cooperative, and has straightforward dental needs, a family dentist who sees patients of all ages can be a wonderful option. There is also something to be said for the convenience of having the whole family seen at one office.

Some children are naturally easy going in dental settings. They sit still, open wide, and tolerate routine procedures without difficulty. For these patients, the specialized behavioral training of a pediatric dentist may be less critical. The quality of the relationship between your child and their dentist matters more than the specific letters after the provider's name.

As children grow into teenagers and young adults, many transition from a pediatric dentist to a general dentist. This transition typically happens somewhere between ages fourteen and eighteen, though there is no hard rule. Some pediatric practices see patients through age twenty one or beyond if the patient has special needs.

Making the Right Choice for Your Family

The decision between a pediatric dentist and a general dentist does not have to be permanent or absolute. Some families start with a pediatric specialist during the early years when behavior management and developmental monitoring are most important, then transition to a general dentist as their child matures. Others find a family dentist they love and stay there from the beginning.

When evaluating either type of provider, look for someone who is patient, communicates well with children at their level, and creates a positive environment. Ask about their experience with pediatric patients and how they handle anxious or uncooperative children. Observe how the office staff interacts with young patients. These observations will tell you more than any credential alone.

Whatever you choose, the most important thing is that your child receives regular dental care starting early in life. Establishing good habits, catching problems early, and building a trusting relationship with a dental provider are benefits that last a lifetime. Whether that provider is a pediatric specialist or a skilled general dentist matters far less than the consistency and quality of the care they receive.

Read more…

Here is something that surprises many patients when they begin orthodontic treatment: the number of appointments involved. Orthodontics is not a one and done procedure. It requires consistent, regular visits over an extended period, typically eighteen months to three years depending on the complexity of your case. That reality makes the location of your orthodontist's office far more important than most people realize when they first start looking for a provider.

13527957878?profile=RESIZE_710x

I have watched patients choose practices based solely on reputation or a friend's recommendation without considering logistics. Three months into treatment, the forty minute drive each way starts to feel like a burden. Appointments get rescheduled. Then rescheduled again. Treatment slows down. It is a pattern I have seen play out many times, and it is almost always avoidable with a little planning upfront.

How Often You Will Visit

How often do you visit the orthodontist during treatment? For most patients, the answer is every four to eight weeks. During active treatment with braces, you will typically come in every six weeks for adjustments. With clear aligners, the schedule varies but often involves check ins every six to ten weeks. In the early stages, visits may be more frequent as your orthodontist fine tunes your treatment plan. Near the end, they may space out slightly.

Add it up and you are looking at fifteen to thirty office visits over the course of treatment. For a child or teenager, those visits need to work around school schedules. For an adult, they need to fit into a workday. Every visit requires travel time, time in the office, and travel time back. When your orthodontist is conveniently located, each appointment might take an hour out of your day. When they are far away, it could take half a day.

Close to Home or Close to Work

Should you pick an orthodontist close to home or work? This is a personal decision that depends on your schedule and circumstances, but there are a few factors worth considering. If you are an adult seeking treatment for yourself, an office near your workplace can be incredibly convenient. You can pop out during a lunch break or schedule early morning appointments before your workday begins. The proximity means fewer disruptions to your professional schedule.

However, if you are a parent bringing a child to appointments, proximity to home or school often makes more sense. After school appointments are common in orthodontic practices for exactly this reason. An office that is close to your child's school or your home allows you to minimize the disruption to everyone's afternoon routine.

Some families find that an office located between home and work, perhaps along their daily commute route, offers the best of both worlds. The key is thinking realistically about how you will get to appointments week after week, month after month. What seems like a minor inconvenience on the first visit can become a major frustration by the twentieth.

Accessibility Beyond Distance

Location is about more than just miles on a map. True accessibility includes factors like parking availability, public transit access, office hours, and ease of scheduling. An office might be only ten minutes from your home, but if parking is a nightmare or they only offer appointments during hours when you are unavailable, the proximity loses much of its value.

Consider the practice's hours of operation. Many orthodontic offices offer early morning, late afternoon, or even Saturday appointments to accommodate working adults and school age patients. If a practice only operates during standard business hours, that limits your flexibility significantly. Ask about scheduling options during your consultation so you understand what is realistically available.

In my practice, we have always tried to offer flexible scheduling because we know that accessibility directly affects compliance. When it is easy for patients to keep their appointments, they keep them. When it is difficult, they postpone. Postponed appointments mean longer treatment times and potentially compromised results.

The Impact on Treatment Outcomes

This connection between convenience and outcomes is not something I say to be dramatic. It is a clinical reality. Orthodontic treatment relies on consistent, incremental adjustments. When appointments are missed or delayed, teeth may not move according to plan. Wires may need to be in place longer than ideal. Aligners might not track properly without timely intervention.

For teenagers especially, missed appointments can extend treatment by months. And longer treatment means more time in braces during a period of life when most kids are eager to be done. I have seen cases that should have taken eighteen months stretch to twenty four or even thirty months simply because scheduling difficulties led to inconsistent attendance.

Emergency Access

Another aspect of location that patients sometimes overlook is emergency access. Orthodontic emergencies are rarely serious in a medical sense, but a poking wire or broken bracket can be painful and uncomfortable. When your orthodontist is nearby, getting a quick fix is simple. When they are far away, you might endure days of discomfort before you can get in for a repair.

Most orthodontic issues can be managed temporarily at home with wax or other tools your office will provide. But knowing that help is accessible if needed provides peace of mind that should not be underestimated, particularly for parents of younger patients.

Planning for the Long Haul

My advice to anyone beginning their orthodontic search is this: think about the long game. You are not choosing a restaurant for one dinner. You are choosing a partner for a journey that will last a year, two years, or more. The office that is slightly farther away but has a glowing reputation might be worth considering, but be honest with yourself about whether you will consistently make that drive over dozens of appointments.

The ideal situation is finding an orthodontist who combines clinical excellence with convenient access. Fortunately, in most communities, there are excellent providers in a variety of locations. Do your research on credentials and care quality first, then let proximity serve as a practical tiebreaker among your top choices. Your future self, sitting in the car on the way to appointment number twenty three, will thank you for thinking ahead.

Read more…

When people think about orthodontic treatment, they often focus on the end result: a straight, beautiful smile. But the journey to that result matters just as much as the destination. In my years of practice, I have seen that the patients who are happiest at the end of treatment are not necessarily the ones with the most complex or dramatic transformations. They are the ones who felt cared for, informed, and respected throughout the entire process.

13554687866?profile=RESIZE_584x

What should you expect from a good orthodontist? That is a question worth exploring because expectations shape experience. If you walk into an office expecting to be treated like a number, you might not notice when that is exactly what happens. But if you know what excellent care looks like, you can recognize it and seek it out.

Communication That Builds Confidence

The foundation of a great orthodontic experience is communication. From the very first phone call, you should feel that your questions are welcome and your concerns are heard. A good practice does not rush through consultations or rattle off treatment plans in clinical jargon. They take the time to explain what is happening with your teeth or your child's teeth, what the recommended treatment involves, and why they believe it is the best approach.

I had a teenage patient a few years ago who was terrified of getting braces. His previous dentist had mentioned he needed orthodontic work, but no one had ever explained what that actually meant. At our consultation, we spent extra time walking him through every step, showing him what the braces would look like, letting him hold the brackets, and answering every question he had. By the end of that appointment, his anxiety had transformed into genuine curiosity. That is what good communication does.

Throughout treatment, communication should remain consistent. You should know what is happening at each appointment, whether your treatment is on track, and what you need to do at home to support the process. If something changes or a challenge arises, your orthodontist should explain it clearly and discuss options with you rather than making unilateral decisions.

Respect for Your Time

How do you know if your orthodontist is good? One reliable indicator is how they treat your time. A well managed practice runs on schedule. Occasional delays happen in any healthcare setting, but if you routinely wait thirty or forty minutes past your appointment time, that suggests a systemic problem with scheduling or staffing.

Respecting your time also means making appointments efficient without being rushed. The best practices have streamlined their workflows so that routine visits are quick and focused. You should be in and out in a reasonable amount of time while still feeling that you received thorough attention. This balance between efficiency and attentiveness is a hallmark of a practice that values its patients.

A Team That Genuinely Cares

Orthodontic treatment is a team effort. The orthodontist provides clinical leadership, but the assistants, scheduling coordinators, and front desk staff all play important roles in your experience. In the best practices, every team member treats patients with warmth and professionalism.

Pay attention to how the staff interacts with children and teenagers, who make up a large portion of orthodontic patients. Are they patient and encouraging? Do they use age appropriate language? A practice that excels with young patients typically excels with adults as well because the underlying skill is the same: the ability to meet people where they are and make them feel comfortable.

I have always believed that a practice is only as good as its weakest link. That is why investing in team training and culture matters so much. When every person in the office shares a commitment to excellent patient care, you can feel it the moment you walk through the door.

Transparency in Treatment Planning

A great orthodontic experience includes full transparency about what treatment will involve, how long it will take, and what it will cost. There should be no surprises or hidden fees. Your treatment plan should be documented clearly, and you should have a copy to reference at any time.

Transparency also extends to managing expectations. No ethical orthodontist will promise perfect results or guarantee specific timelines. Biology is unpredictable, and patient compliance plays a significant role in outcomes. What a good provider will do is give you an honest assessment, explain the factors that could influence your results, and commit to working with you through any challenges that arise.

Comfort and Environment

The physical environment of an orthodontic office sends a message. A clean, well maintained space with modern equipment suggests a practice that takes its work seriously and reinvests in providing the best possible care. Comfortable seating, pleasant lighting, and thoughtful touches like entertainment options or beverage stations may seem superficial, but they reflect an attention to patient experience that often extends to clinical care as well.

For parents bringing children to appointments, consider whether the office is family friendly. Is there space for younger siblings? Are appointment times available before or after school? These practical considerations affect the overall experience significantly, especially when treatment spans one to three years.

Follow Through After Treatment

The relationship between patient and orthodontist should not end the day braces come off. Retention is a critical phase that protects your investment, and a good practice provides clear guidance about retainer wear and schedules follow up appointments to monitor stability.

The best experiences I have seen are ones where patients feel like valued members of a community rather than entries on a schedule. When you find a practice that combines clinical excellence with genuine human connection, you have found something special. That combination is what transforms a necessary medical treatment into a positive, even enjoyable, chapter of your life.

Read more…

13676200099?profile=RESIZE_710x

Dental problems rarely follow a schedule. A sharp toothache can wake you up at night. A broken tooth can happen during a meal or even while playing sports. These moments feel stressful because they come without warning. You may not know what to do first or how serious the situation is.

In such situations, acting quickly matters. Knowing the right steps can reduce pain and prevent further damage. Many people in urgent situations often search for an emergency dentist in Westwood, NJ because quick access to care can make a big difference when time is critical. Understanding how to respond in those first moments can help you stay calm and in control.

Key Takeaways

  • Dental emergencies can happen anytime and need quick action
  • Early response can reduce pain and prevent complications
  • Not all dental issues require the same level of urgency
  • Simple first-aid steps can protect your teeth
  • Professional care should not be delayed in serious cases

What Counts as a Dental Emergency?

Not every dental issue needs immediate care, but some clearly do. Severe pain, swelling, bleeding, or a knocked-out tooth are strong signs of an emergency.

Here are common situations that need urgent attention:

  • Intense toothache that does not go away
  • Broken or cracked tooth
  • Knocked-out tooth
  • Swelling in gums or face
  • Bleeding that does not stop

If you notice any of these, it is best to act quickly rather than wait.

First Step: Stay Calm and Assess the Situation

Panic can make things worse. Take a moment to understand what has happened. Look at the affected area and check for visible damage.

Ask yourself:

  • Is there bleeding?
  • Is the tooth broken or missing?
  • How severe is the pain?

This quick check helps you decide your next move.

How to Handle Common Dental Emergencies

Toothache

Rinse your mouth with warm water. This helps clean the area. Avoid placing aspirin directly on the tooth. It can harm the gum tissue. Use a cold compress on the outside of your cheek to reduce pain.

Knocked-Out Tooth

Pick up the tooth by the top, not the root. Rinse it gently if dirty. Try placing it back in the socket if possible. If not, keep it in milk or a clean container with saliva. Time is very important here.

Broken or Chipped Tooth

Rinse your mouth to remove any debris. Save any broken pieces if you can. Use a cold compress to control swelling.

Swelling or Infection

Swelling may indicate infection. Rinse with salt water to reduce bacteria. Do not ignore swelling, especially if it spreads.

When You Should Not Wait

Some signs mean you need help right away:

  • Severe swelling affecting breathing
  • Uncontrolled bleeding
  • Intense pain that does not improve
  • Injury to the face or jaw

Delaying treatment in these cases can lead to serious complications.

Why Quick Action Makes a Difference

Dental problems can worsen quickly. What starts as a small issue can turn into a major one if ignored. Acting early helps protect your tooth and reduces the need for complex procedures later.

Quick care also improves the chances of saving a damaged or knocked-out tooth.

Simple Ways to Be Prepared

You cannot always prevent emergencies, but you can stay ready.

Keep these tips in mind:

  • Save your dentist’s contact details
  • Have a small dental first-aid kit at home
  • Wear a mouthguard during sports
  • Avoid using teeth to open hard objects

Preparation helps you respond faster when something unexpected happens.

What to Expect During Emergency Dental Care

When you visit a dentist for an emergency, they first focus on relieving pain. Then they examine the problem and decide the best treatment.

This may include:

  • Cleaning the affected area
  • Repairing the tooth
  • Treating infection
  • Stabilizing the tooth

The goal is to fix the issue and prevent it from getting worse.

Final Thoughts

Dental emergencies can feel overwhelming, especially when they happen at the wrong time. But knowing what to do can make the situation easier to handle. Quick action, simple first-aid steps, and timely professional care can protect your teeth and reduce discomfort.

Read more…

For many families in Missouri City, life moves fast. Between school schedules, work commitments, and community activities, finding time for self-care can feel like a luxury. Yet, your smile plays a powerful role in your confidence, health, and everyday interactions.

That’s why more families are turning to a trusted dentist in Missouri City TX for efficient, personalized smile makeover solutions that fit seamlessly into their busy lifestyles.

A smile makeover is no longer a lengthy or complicated process reserved for celebrities. Today, with advanced dental technology and a patient-first approach, achieving a healthy, radiant smile is more convenient than ever.

What Is a Smile Makeover

A smile makeover is a customized combination of cosmetic and restorative dental treatments designed to improve the appearance and function of your teeth. Instead of focusing on a single issue, it takes a comprehensive approach to address concerns like discoloration, chipped teeth, gaps, misalignment, and missing teeth.

At Alonso Family Dental, smile makeovers are tailored to each patient’s goals, lifestyle, and oral health needs. This personalized care ensures natural-looking results that enhance your overall facial aesthetics.

Why Busy Families in Missouri City Are Choosing Smile Makeovers

Families in Missouri City often juggle multiple responsibilities, which makes convenience a top priority. A modern smile makeover offers several advantages that align perfectly with busy schedules:

Efficient Treatment Planning

Advanced tools such as digital scanners and smile design software allow dentists to map out your entire treatment plan in fewer visits. This reduces time in the chair while improving accuracy.

Multiple Treatments in One Plan

Instead of scheduling separate procedures over months or years, a smile makeover combines treatments like veneers, whitening, and crowns into a streamlined process.

Long Lasting Results

High quality materials and precise techniques mean your results are designed to last, minimizing the need for frequent follow-ups.

Improved Oral Health

Beyond aesthetics, correcting issues like worn teeth or misalignment can make daily hygiene easier and reduce the risk of future dental problems.

Common Smile Makeover Treatments

A smile makeover can include a range of services depending on your needs. Some of the most popular options for families in Missouri City include:

Teeth Whitening

Professional whitening can quickly remove stains caused by coffee, tea, or aging, giving you a noticeably brighter smile in a short time.

Porcelain Veneers

Veneers are thin, custom-made shells placed on the front of teeth to correct imperfections such as chips, gaps, or uneven shapes.

Dental Crowns and Bridges

These restorations strengthen damaged teeth and replace missing ones, restoring both function and appearance.

Dental Implants

For patients with missing teeth, implants provide a permanent solution that looks and feels natural.

Orthodontic Enhancements

Clear aligners or minor orthodontic treatments may be included to improve alignment as part of the makeover.

A Personalized Approach to Family Dental Care

What sets a great smile makeover apart is not just the technology but the expertise behind it. Working with an experienced dentist in Missouri City TX ensures that every aspect of your treatment is carefully planned and executed.

Dr. Carlos A. Alonso brings more than two decades of experience in cosmetic and restorative dentistry. His advanced training and commitment to patient-centered care allow him to create smile transformations that look natural and function beautifully.

According to Dr. Alonso, he emphasizes that every smile makeover should reflect the patient’s personality and lifestyle, noting that the goal is not just to improve appearance but to enhance long term oral health and confidence.

Designed for Comfort and Convenience

Dental anxiety and time constraints often prevent families from seeking treatment. Modern dental practices in Missouri City are addressing these concerns by focusing on comfort and efficiency.

At Alonso Family Dental, patients benefit from advanced technologies like digital imaging, AI-assisted diagnostics, and precise treatment planning. These tools help reduce uncertainty and make procedures more predictable.

Additionally, a welcoming environment and compassionate care team ensure that patients of all ages feel at ease during their visits. This is especially important for families introducing children to dental care or adults who may have delayed treatment due to fear or busy schedules.

Serving the Missouri City Community

Missouri City is known for its family-friendly neighborhoods, strong sense of community, and active lifestyle. From areas like Sienna Plantation and Riverstone to Quail Valley, residents value quality healthcare that fits into their daily lives.

Choosing a local dental provider means access to consistent care, flexible scheduling, and a team that understands the unique needs of the community. Whether it’s preparing for a special event, improving professional confidence, or simply maintaining good oral health, smile makeovers are becoming an integral part of family wellness in the area.

When Is the Right Time for a Smile Makeover

There is no perfect age or stage for a smile makeover. It may be the right time if you:

Feel self-conscious about your smile Have multiple dental concerns you want to address together Want a long-term solution instead of temporary fixes Are preparing for an important life event Have been delaying dental care due to a busy schedule

A consultation with a qualified dentist in Missouri City TX can help determine the best approach for your needs.

Investing in Your Smile and Your Confidence

A smile makeover is more than a cosmetic upgrade. It is an investment in your confidence, health, and quality of life. For busy families in Missouri City, modern dentistry makes it possible to achieve meaningful results without disrupting your routine.

With the right combination of expertise, technology, and personalized care, transforming your smile can be a smooth and rewarding experience. Whether you are looking to make subtle improvements or a complete transformation, partnering with a trusted local dental provider ensures results you can feel proud of every day.

Read more…

Thumb sucking and pacifier use are two of the most natural self-soothing behaviors in infancy and early childhood. Nearly every baby does one or the other, and during the first couple of years of life, these habits are completely normal and rarely cause any lasting dental concerns. But when the habit persists beyond a certain age, it can begin to reshape the developing jaw and teeth in ways that often require orthodontic correction later.

Children-Dentist-in-Bradley-IL.jpg

As an orthodontist, I see the downstream effects of prolonged sucking habits regularly. Parents often feel guilty when I explain the connection, but I always reassure them that these habits are normal and that the effects are very treatable. The goal is not to assign blame but to understand what has happened and what can be done about it.

Why Babies Suck Their Thumbs and Use Pacifiers

Sucking is a natural reflex that begins before birth. Ultrasound images sometimes capture babies sucking their thumbs in the womb. This reflex serves an important purpose: it helps infants feed, and it provides comfort and security. For many babies, sucking on a thumb, finger, or pacifier is a way to self-soothe during stressful moments, at bedtime, or when they are tired.

There is nothing wrong with this behavior in infancy and toddlerhood. In fact, the American Academy of Pediatric Dentistry considers non-nutritive sucking habits to be normal in the first few years of life. The concern arises only when the habit continues beyond the age when it can start to interfere with dental development.

Does Thumb Sucking Cause Crooked Teeth

Yes, prolonged thumb sucking can cause crooked teeth, and the effects go beyond just the teeth themselves. The repetitive pressure of a thumb or fingers resting against the front teeth and the roof of the mouth can alter the shape of the developing dental arches and jaw bones.

The most common effect is an anterior open bite, where the upper and lower front teeth do not meet when the mouth is closed. The thumb essentially prevents the front teeth from erupting fully, creating a gap. I have treated many children whose open bites were directly attributable to thumb sucking. In some cases, the gap was so pronounced that the child could not bite through a piece of lettuce with the front teeth.

Another frequent consequence is a narrowed upper jaw, or palate. The thumb pushes up against the roof of the mouth, and the cheek muscles press inward during sucking. This combination of forces narrows the upper arch, which can lead to a posterior crossbite where the upper back teeth sit inside the lower back teeth.

Flared upper front teeth are also common. The pressure of the thumb pushes the upper incisors forward and outward, creating an excessive overjet (the horizontal distance between the upper and lower front teeth). At the same time, the lower front teeth may be pushed backward, compounding the problem.

Pacifiers can cause similar effects, though some research suggests that pacifier habits may be slightly less damaging than thumb sucking because the pacifier is softer and distributes forces differently. However, the distinction is modest. A prolonged pacifier habit can produce the same types of dental changes as thumb sucking.

At What Age Does Thumb Sucking Affect Teeth

At what age does thumb sucking affect teeth? This is one of the most common questions parents ask me, and the answer involves a bit of nuance. Most experts agree that sucking habits are unlikely to cause lasting dental problems if they stop before age four. Between the ages of two and four, some changes to the baby teeth may be visible, but these often self-correct after the habit stops because the permanent teeth have not yet come in.

The critical threshold is around age four to five. By this age, the permanent front teeth are beginning to develop and move into position beneath the baby teeth. Continued thumb sucking during this period can alter the eruption path and positioning of the permanent teeth in ways that do not self-correct.

The intensity and frequency of the habit also matter. A child who gently rests a thumb in the mouth occasionally is less likely to experience significant dental changes than a child who sucks vigorously for hours each day and throughout the night. Duration (how many hours per day) and force (how hard the child sucks) are both important factors.

I recall a patient who stopped thumb sucking at age five, and by the time she was seven, much of the open bite had improved on its own. Another patient who continued until age eight had changes that required a palatal expander and braces to correct. The timing really does make a difference.

How to Help Your Child Stop

Breaking a sucking habit is easier said than done, and patience is essential. For most children, positive reinforcement works better than punishment or constant reminders, which can create anxiety and actually reinforce the habit.

Praise your child when they are not sucking their thumb, especially during times when they usually would be. A reward chart with small incentives can be effective for many children. For nighttime habits, which are often the hardest to break, a sock or bandage over the hand can serve as a gentle reminder.

If the habit persists despite these efforts, your orthodontist can help. A habit-breaking appliance, such as a tongue crib or palatal rake, can be placed in the mouth. These appliances do not hurt, but they make thumb sucking uncomfortable or unsatisfying, which helps the child lose interest in the habit. In my experience, these appliances are very effective, and most children stop the habit within a few weeks of placement.

Treating the Effects

If a prolonged sucking habit has already caused dental changes, the good news is that orthodontic treatment is very effective at correcting them. A palatal expander can widen a narrowed upper jaw. Braces or aligners can close an open bite and realign flared front teeth. If the habit has stopped and the child is still growing, some of these corrections can be surprisingly straightforward.

The most important thing is to address the habit first. Orthodontic treatment will not be effective if the habit is still ongoing, because the forces from the thumb or pacifier will work against the treatment. Once the habit is broken, we can develop a treatment plan that addresses whatever changes have occurred.

If your child is still sucking a thumb or using a pacifier past age three, there is no need to panic, but it is worth starting to gently encourage them to stop. And if the habit has persisted and you are seeing changes in the teeth or bite, an orthodontic evaluation can give you a clear picture of what is happening and what, if anything, needs to be done. These situations are very common, very manageable, and nothing to feel embarrassed about.

Read more…

bd08c594-a11b-4a74-a03b-9fd8ce159d47.png

The canine teeth are some of the most important teeth in your mouth. They are the cornerstone teeth of the dental arch, designed for tearing food and guiding the jaw during side-to-side movements. They also play a significant role in the aesthetics of your smile. So when a canine tooth gets stuck in the bone and fails to erupt into its proper position, it creates both a functional and cosmetic problem that needs to be addressed.

Impacted canines are the second most commonly impacted teeth after wisdom teeth, and they are a challenge I encounter regularly in my practice. The good news is that in most cases, we can guide these stuck teeth into their rightful position without removing them.

What Is an Impacted Canine Tooth

An impacted canine tooth is a permanent canine that has failed to erupt through the gum into the mouth at the expected time. While most permanent teeth come in between the ages of six and thirteen, the upper canines (also called cuspids) are typically among the last to arrive, usually erupting around ages eleven to thirteen. When one of these teeth gets stuck, either in the bone of the palate (the roof of the mouth) or in the bone above the other teeth on the cheek side, it is considered impacted.

The upper canines are impacted far more often than the lower canines. Studies suggest that about 2 percent of the population has at least one impacted upper canine, and it occurs more frequently in females than males. In about a third of cases, both upper canines are impacted.

Sometimes the canine is only partially impacted, meaning it has started to move toward the surface but has stalled in an abnormal position. Other times, it is deeply embedded in the bone, oriented in an unusual direction, and nowhere close to the path it should be following.

Why Canines Get Stuck

Several factors can cause a canine to become impacted. One of the most common is insufficient space in the dental arch. If the jaw is crowded and there is not enough room for the canine to descend, it may become blocked by adjacent teeth.

The path of eruption matters too. The upper canine has the longest and most complex eruption path of any tooth, traveling from high up near the eye socket, along the side of the nose, and then curving outward and downward into position. With such a long journey, there are many opportunities for the tooth to veer off course.

Missing or undersized lateral incisors (the teeth right next to the front teeth) are a significant risk factor. The roots of the lateral incisors appear to serve as a guide for the erupting canine. When these teeth are absent or smaller than normal, the canine loses its guidance and may wander off in the wrong direction.

Genetics play a role as well. Impacted canines tend to run in families, and they are more common in people with other dental anomalies such as extra teeth (supernumeraries) or congenitally missing teeth.

How Impacted Canines Are Diagnosed

Impacted canines are usually discovered during routine dental exams. A dentist might notice that the baby canine is still present well past the age when it should have fallen out, or they might notice that the permanent canine simply has not appeared. A panoramic X-ray reveals the position of the unerupted tooth, and in many cases a cone-beam CT scan (3D X-ray) is taken to determine the exact location, angulation, and relationship of the impacted canine to the roots of neighboring teeth.

This imaging is critical for treatment planning. Knowing exactly where the tooth is and what direction it is facing allows us to plan the most efficient path to bring it into alignment.

How Do You Fix an Impacted Canine Without Extraction

The standard approach to fixing an impacted canine without extraction involves a partnership between an oral surgeon and an orthodontist. The process has two main phases.

First, the oral surgeon performs a minor surgical procedure to expose the impacted tooth. This involves lifting the gum tissue and, if necessary, removing a small amount of bone covering the tooth. A small orthodontic bracket with a gold chain or elastic thread is then bonded directly to the exposed tooth. The gum tissue is repositioned, and the chain or thread is left accessible.

In the second phase, the orthodontist uses the chain to apply a gentle, sustained force that gradually guides the impacted canine through the bone and gum tissue into its proper position in the arch. This is done in conjunction with braces on the other teeth, which create space for the canine and provide anchorage for the pulling forces.

I always explain to patients and parents that this process requires patience. Moving an impacted canine into position is not fast. Depending on how deeply impacted the tooth is and how far it needs to travel, this part of treatment can take anywhere from 6 to 18 months, sometimes longer. I had a case a couple of years ago where a deeply impacted canine took 14 months of gentle traction before it was finally visible in the mouth. But once it arrived, it lined up beautifully with the rest of the teeth.

The key is applying the right amount of force. Too much force can damage the tooth or the roots of adjacent teeth. Too little, and the tooth will not move. This is where experience and careful monitoring through periodic X-rays make a real difference in outcomes.

When Extraction Is Necessary

While the goal is almost always to save the impacted canine, there are situations where extraction becomes the better option. If the tooth is fused to the bone (ankylosis), it will not respond to orthodontic forces and cannot be moved. If the tooth is in a position where attempting to move it would damage the roots of neighboring teeth, extraction may be recommended. In rare cases where the impacted canine has developed a cyst around it, removal becomes necessary for health reasons.

When a canine must be extracted, the space can be managed in several ways. The premolar behind it can be moved forward to fill the gap, or the space can be maintained for a future dental implant. A skilled orthodontist and restorative dentist can often create a result that looks and functions well even without the natural canine.

The Importance of Early Detection

Early detection of a potentially impacted canine can significantly simplify treatment. By age seven or eight, a dental professional can assess whether the canine is developing normally by feeling for the bulge of the tooth through the gum above the baby canine. If the canine does not appear to be descending properly, early intervention such as extracting the baby canine can sometimes redirect the permanent canine onto a better path, potentially avoiding the need for surgical exposure altogether.

This is one of many reasons the first orthodontic evaluation by age seven is so important. Catching a canine that is heading in the wrong direction early gives us options that simply are not available once the tooth has become fully impacted in an unfavorable position. If your child's baby canine seems to be hanging on longer than expected, or if the permanent canine has not appeared by age thirteen, an evaluation is well worth your time.

Read more…